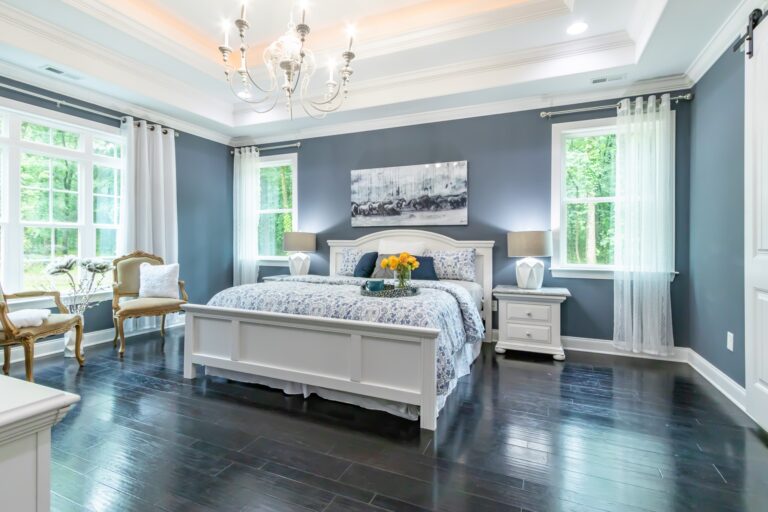
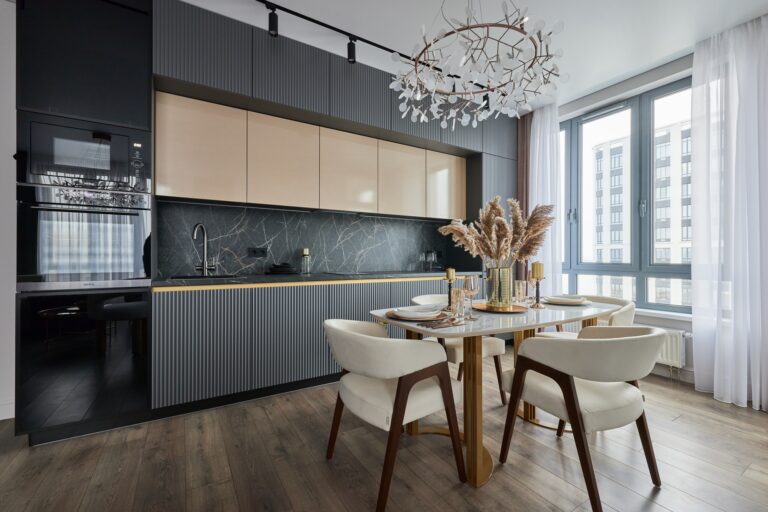
Nothing brings a design concept to life quite like allowing a client to “walk” through it. That’s why 3D walkthroughs have become an essential visualization tool for interior designers. Unlike drawings or renders, they reveal spatial flow, scale, and the full scope of the design, long before construction even begins.
In this post, we’ll cover what 3D walkthroughs are, how they differ from other visual tools, when to use them, the best software options, the benefits they offer, and common mistakes to avoid.
Table of Contents
What is a 3D walkthrough?
A 3D walkthrough is a digital representation of a space that allows clients to “walk” through an environment before it’s built.
These creative videos offer clients a guided tour of their future home, office, or commercial space, complete with accurate lighting, realistic materials, and true-to-scale furnishings. Whether it’s delivered as a guided video or an interactive experience that clients can control themselves, a 3D walkthrough provides a highly accurate preview of the finished project.
In interior design, this tool has quickly become an essential part of the visualization process. While mood boards and static renders help clients connect with aesthetics, a 3D interior walkthrough goes a level deeper, essentially transforming design intent into a lived experience.
How are they made? A strong walkthrough is built from detailed 3D models. The process requires thoughtful camera path planning and the right rendering engine.
Clients don’t need tech expertise to understand it—they simply click play and experience their future space. As a designer, you may not need extensive tech expertise to create them either, depending on the specific software you choose.
How 3D walkthroughs differ from floor plans and renders
Interior designers often use a combination of floor plans, 3D renders, and 3D walkthroughs. Each serves a specific purpose. Here’s a glimpse into how they differ:
- Floor plans provide structure, but lack detail
- Renders showcase visuals, but lack context and movement
- Walkthroughs combine both, helping clients fully understand the space
Each tool serves a specific purpose, but 3D walkthroughs are the most immersive way to present a space before it’s made.
Want to learn more about floor plan software or floor plan symbols? Our detailed guides would make the perfect next read.
Why interior designers use 3D walkthroughs
Above all else, professional interior designers integrate 3D walkthroughs to enhance communication, support smooth decision-making, and improve client satisfaction levels. If you look closely at each of these reasons, you’ll find a plethora of detailed benefits.
By implementing 3D walkthroughs in your own workflow, you can expect to:
- Reduce back-and-forth due to design uncertainty
- Help clients make quicker and more confident decisions
- Make your presentations feel more professional
- Help catch issues early in the process
- Increase client satisfaction (and referrals)
- Make remote projects more efficient
Whether you’re presenting to a local homeowner, a remote client, or a full development team, walkthroughs ensure everyone is aligned around the same design intent. And once you start using them regularly, you’ll notice these perks popping up throughout your process.
When to include a 3D walkthrough in your design process
A 3D walkthrough can support your design workflow at multiple stages, but its impact is strongest when it’s used intentionally—not simply as an add-on at the end of the project. Interior designers who get the most value from walkthroughs use them strategically.
Below are a few key moments in the design process when a 3D interior walkthrough would be especially helpful.
1. During early spatial planning
Even though concept development usually begins with mood boards, sketches, or conceptual layouts, adding a simple walkthrough early on can prevent direction changes later in the process. At this stage, the walkthrough won’t have full materials or accurate lighting. A clean, conceptual model is enough to help clients understand the general feel of the space.
2. When presenting multiple layout options
If you’re comparing two or three potential floor plans, a walkthrough provides quick clarity. For example, if one kitchen option opens toward the living room and another creates a more defined zone, a 3D walkthrough will help them decide which version feels like a better fit for their lifestyle.
3. Before client ordering or procurement
Once the specification list is nearly complete, a walkthrough ensures that everything feels just as good as it looks. Clients can confirm color palettes, spatial flow, and the functionality of the space before you place orders. This reduces the likelihood of returns, redesigns, or expensive change orders.
4. When working with virtual or remote clients
For remote projects, 3D walkthroughs replace the experience of on-site walkthroughs. Instead of relying on PDF plans and emails, you’ll give your clients a guided tour that they can watch over and over.
5. When presenting final designs
3D walkthroughs turn your final presentation into a clear and professional reveal. It shows exactly what clients can expect from their end project, from lighting and furniture to the tiniest details.
Many designers also use these final 3D walkthroughs for:
- Design packages
- Marketing
- Portfolio showcases
- Social media content
By using walkthroughs for marketing instead of still photos, you’re providing leads with the same level of professionalism they’ll receive when they work with you.
Step-by-step: how to create a 3D walkthrough
The process for creating a walkthrough depends on your software, but the general workflow is similar across all platforms. Here’s an overview of what to expect:
Step 1: Start with an accurate 3D model
Everything begins with a reliable model. Import or create a model with exact dimensions, including:
- Walls, windows, and doors
- Ceiling heights and structural elements
- Cabinetry and built-ins
- Architectural details
- Accurate furniture scale
If the project is a remodel, you will need to log the space’s existing conditions first. If it’s new construction, use the architect’s plans.
Step 2: Add materials, finishes, and lighting
Once the model is complete, apply the materials and textures that you’ll actually use in your work. For a mid-stage walkthrough, you can keep materials simplified. For a final version, use exact match, high-resolution textures and realistic fabrics.
Lighting is especially important. In walkthroughs, lighting affects the feel of the space more than any other element.
Step 3: Plan your camera path
A walkthrough is similar to a guided tour. This step is where you plan the route you’ll take throughout the space.
Strong walkthroughs typically start at an entry point and move through the space in a natural sequence. Focus on how your client will actually move through the space once it’s complete, and let that real-life flow guide your camera path.
Step 4: Adjust pacing, transitions, and keyframes
Once the camera path is set, refine it. Smooth transitions create a professional feel and help clients stay oriented.
You may need to adjust:
- Camera speed
- Rotation angles
- Field of view
- Easing in and out of movement
- The number of keyframes
- Timing around focal points
Step 5: Render the walkthrough
Depending on your software, you’ll either export a real-time walkthrough or render a frame-by-frame animation. Real-time engines (like those used in some virtual walkthrough interior design software) can export instantly. More photorealistic engines may require hours of rendering time.
Choose the rendering mode based on the purpose:
- Early review: Low-resolution real-time output
- Design development: Medium-resolution with basic lighting
- Final presentation: High-quality, fully lit, cinematic animation
Export as MP4, MOV, or an interactive format depending on client preference.
Step 6: Review and refine
Never send a walkthrough without reviewing it yourself. Watch it all the way through and look for:
- Awkward transitions
- Lighting inconsistencies
- Incomplete materials
- Areas where the camera clips too close to objects
- Pacing that feels too fast or too slow
Step 7: Deliver the walkthrough to the client
When you share your walkthrough, include a brief explanation of what it shows and when it was created in the design process. Depending on the platform, you may export the walkthrough as:
- A standalone video
- An interactive link
- A VR-ready file
- A web-based player
Tools interior designers use to build 3D walkthroughs
Interior designers have more visualization tools available today than ever before, but they’re not all created equally. The key is choosing software that’s both powerful and aligned with the way you actually work. Below are the platforms designers rely on most often:
1. DesignFiles
DesignFiles stands out because its 3D walkthrough builder is fast, approachable, and built for real interior design workflows. You can design floor plans, place furniture, apply finishes, and generate interactive walkthroughs—all in one intuitive platform. There’s no steep learning curve, and because it’s cloud-based, you can work from anywhere without high-end hardware.
For solo designers, boutique studios, and full-service firms, that kind of efficiency makes a difference. Guided tours help clients visualize the space, feel confident in their decisions, and approve faster—saving you time on back-and-forth revisions.
But walkthroughs are just one part of what makes DesignFiles a game-changer. This all-in-one design and business platform also includes:
- Moodboards, 2D and 3D floor planning, and visual walkthroughs
- Built in AI rendering tool
- A built-in, customizable product library and browser-based product clipper
- Shoppable product links and affiliate support (including SideDoor integration)
- Task lists, time tracking, and shared project calendars
- Digital contract templates with built-in e-signatures
- A client portal for sharing files, collecting feedback, and processing payments
- Team collaboration tools, including internal and client-side messaging
- The ability to sell online design packages directly from your account
- Quotes, branded invoices, and secure online payment processing
- Basic financial reports and QuickBooks Online integration
Interested? Try DesignFiles free and explore how 3D walkthroughs and business tools come together in one seamless platform.
2. SketchUp + Enscape
SketchUp is a long-standing industry favorite, thanks to its modeling flexibility and extensive list of plugins. On its own, SketchUp can handle the modeling portion, but pairing it with Enscape turns it into a real-time visualization powerhouse.
Enscape allows you to create 3D walkthroughs with realistic lighting, animated camera paths, and instant rendering. Because Enscape syncs live with SketchUp, you can make changes in real time and immediately preview the change inside the walkthrough. This pairing is good for designers who want full control without sacrificing speed.
Feature highlights include:
- Flexible 3D modeling with precise control over geometry
- Real-time rendering synced directly with SketchUp
- Live walkthrough previews as you design
- Realistic lighting, shadows, and reflections
- Animated camera paths for guided walkthroughs
- Large plugin ecosystem to extend functionality
3. Revit + Twinmotion
For designers who collaborate closely with architects or work on larger commercial projects, Revit and Twinmotion are worth considering. Revit provides BIM-level modeling accuracy, while Twinmotion converts those models into immersive walkthroughs.
Twinmotion specializes in quick, high-quality virtual walkthroughs. Its professional-grade results are a great match for stakeholder presentations, developer pitches, and large project approvals.
Key features designers rely on include:
- BIM-level accuracy for complex architectural models
- Seamless import of Revit models into Twinmotion
- High-quality real-time walkthrough rendering
- Built-in assets for landscaping, people, and context
- Smooth navigation for large-scale commercial spaces
- Presentation-ready visuals for stakeholder reviews
4. Lumion
Lumion is known for its emotional impact. While SketchUp or Revit handle modeling, Lumion adds rich lighting and high-end rendering tools that make walkthroughs feel cinematic. Its features are especially helpful when you need to communicate mood—think soft morning light, warm evening tones, or the feeling of movement through a lively space. Its high-end capabilities are perfect for studios that focus on upscale residential or luxury commercial interiors, without worrying so much about cost.
Designers use Lumion for features like:
- Cinematic lighting and atmospheric effects
- Advanced material and texture controls
- Weather, foliage, and environmental animations
- Smooth walkthrough and fly-through animations
- High-end render output for luxury presentations
- Strong emotional storytelling through visuals
Benefits of 3D walkthroughs for clients and presentations
A 3D walkthrough does more than illustrate your design. Here’s a look at some of the specific benefits you can expect your clients to gain from your work:
1. Clients experience the design instead of interpreting it
For many clients, looking at a render or floor plan still requires imagination. They see the design but can’t fully understand how it feels. A walkthrough solves that instantly. Instead of asking them to interpret drawings, you let them walk through the space and experience the atmosphere firsthand.
They can observe:
- How furniture placement affects movement
- How lighting influences mood
- How open or enclosed a room feels
- How the design transitions from one area to the next
2. Faster decisions and fewer revisions
Clients make decisions more confidently when they fully understand the design. And 3D walkthroughs show the full context, with nothing left to surprise them at the end.
When clients understand the full design early on, they:
- Hesitate less
- Consider fewer options
- Make decisions faster
- Request fewer revisions later in the process
3. Clearer communication for remote clients
3D walkthroughs bring crystal clear communications to the remote world. Clients, contractors, and other decision-makers can view from anywhere. It becomes a consistent reference point that keeps everyone on the same page at all times.
4. Stronger presentations that elevate your brand
Walkthroughs set your studio apart. They not only lead to happier clients, but also better referrals and marketing tools as well.
Many designers use walkthroughs to strengthen:
- Consultation calls
- Presentations for large projects
- Final design reveals
- Social or portfolio content
5. Better alignment with builders and contractors
When contractors understand your intent visually, they’re less likely to misinterpret drawings. This helps reduce costly construction changes from popping up at the end of the project.
With 3D walkthroughs, builders can clearly see:
- Cabinet clearances
- Lighting placement
- The interplay between architecture and furnishings
- Sightlines that matter to the design
- How structural adjustments affect flow
Common mistakes to avoid when creating 3D walkthroughs
Even the most experienced designers make mistakes from time to time. Avoid the following pitfalls to help your walkthroughs feel professional and aligned with your design intent.
1. Starting with an inaccurate model
A 3D walkthrough is only as good as the model behind it. If dimensions, wall placements, ceiling heights, or window locations are off by even a small amount, it could mislead your client.
How to avoid: Make sure you always verify measurements before beginning work on your model.
2. Adding an overwhelming amount of detail
While it’s important to be realistic, it is possible to overdo it. Too many textures or decorative elements can slow down your software and distract from your design.
How to avoid: Focus on the details that matter: key finishes, spatial flow, and lighting.
3. Ignoring your lighting quality
Lighting can transform a walkthrough. It can also ruin it. Many walkthroughs feel flat or unrealistic because they rely on default lighting settings.
How to avoid: Be sure to take time to adjust your:
- Natural light direction
- Fixture brightness
- Color temperature
- Shadows
- Highlights
- Ambient light levels
4. Using materials that don’t match the final products
If a client sees walnut cabinetry in the walkthrough but the final design uses white oak, the model won’t feel realistic. It may even lead to returns or change orders later on, if they trust the walkthrough over the material list.
How to avoid: Always update materials before delivering a walkthrough for approvals.
5. Showing a walkthrough too early or without context
A mid-stage walkthrough is different from a final presentation walkthrough. If clients expect a polished product but see an early model, it can create confusion.
How to avoid: Set expectations clearly, especially when showing early-stage walkthroughs. Make sure the clients are aware that the design will change over time.
6. Forgetting to review the walkthrough end-to-end
Before sending the file to a client, watch it from start to finish. If you spot an error and take the time to fix it, this five-minute review could save your entire presentation.
How to avoid: Look for:
- Glitches
- Missing materials
- Awkward angles
- Inconsistent lighting
Walkthroughs bring your work to life. With the right workflow and tools (whether that’s DesignFiles or a rendering-specific software), you can streamline your process, improve communication, and create an immersive client experience every time. Want to learn more about sharing your vision with clients? Check out our deep dive with Sheilah Macsporran on advanced 3D floor planning.
Build your business on the right foundation with DesignFiles.
![2026-2027 Interior Design Conferences & Tradeshows [Ultimate List]](https://blog.designfiles.co/wp-content/uploads/2024/11/interior-design-events-768x512.jpeg)