Clients don’t struggle to approve design concepts because they lack imagination. They hesitate because they can’t clearly see themselves saying yes yet.
When moodboards are vague, cluttered, or disconnected from real products, clients second-guess decisions, request revisions, and stall the project. That’s not a creativity problem, it’s a clarity problem.
A great interior design moodboard does more than look beautiful. It helps clients understand the vision, feel confident in the selections, and move forward without hesitation.
In this guide, we’ll show you how professional interior designers create moodboards that:
- Get faster client approvals
- Reduce revisions and back-and-forth
- Clearly communicate style, scale, and intent
- Fit seamlessly into a repeatable, professional design workflow
You’ll learn the two main types of interior design moodboards—classic moodboards and full-room moodboards (roomboards)—plus exactly how and when to use each so clients feel confident approving your ideas.
Whether you’re presenting concepts for a full-service project or an e-design package, this step-by-step process will help you turn inspiration into decisions, and designs into signed-off plans.
Table of Contents
Who this guide is for
This guide is designed for interior design professionals who use moodboards as part of their client presentation process, not just for inspiration, but for decision-making.
It’s especially helpful if you’re:
- An interior designer presenting concepts and selections to clients
- An e-designer who needs clear, visual approvals without live meetings
- A designer tired of endless revisions, second-guessing, and “can we see another option?”
- A designer who wants moodboards that translate cleanly into real products, specs, and purchasing
If your goal is to help clients understand your vision, feel confident saying yes, and move projects forward with less friction, you’re in the right place.
How to create interior design moodboards step-by-step
Watch our tutorial for all of the details. In this video, we recreate a moodboard using best practices and make it more visually appealing:
Here’s how to develop the perfect moodboard:
PHASE 1: Product sourcing and prep
Before you start arranging anything, get your selections clean and presentation-ready. Strong sourcing and image prep create clarity from the beginning and prevent confusion that slows down approvals later.
Step 1. Pick your products and materials
The first step is to go into creative mode. You will choose your furnishings, paint swatches, window treatments, accessories, flooring, and more. To be sure that items will fit in the space (in terms of both size and style), you might need to create a 3D floor plan first. Then, you can add your final choices to your moodboard. For simple design projects, you can go straight to moodboard creation.
To make product sourcing quick and easy, use our Browser Clipper Extension. Add products to your library while you’re surfing the web (find a video tutorial here and installation instructions here).
Step 2. Remove the backgrounds of product images
With both classic and full-room moodboards, it’s essential to remove backgrounds. You want cleanly cut product images so that you’re only showing your client what you’re planning for their space—not random stuff in the brand’s photoshoot.
When designing moodboards with DesignFiles, you can use our automatic background-removal tool to handle this in an instant.
Step 3. Try Google Lens to find product images with white backgrounds
Automated background removal works great most of the time. But sometimes, a product will just be too close in tone to its background. When this happens, try using Google Lens to find a photo of your chosen product that already has a white background. Products are often carried on multiple websites, some of which might offer different photographs to choose from.
To access Google Lens, just head to images.google.com and click on the multi-colored camera icon in the search bar.

Step 4. Crop images to focus on the important details
When adding images to your moodboard, make sure to only focus in on the details that the client needs.
For example, a cropped image of a curtain panel that showcases the pattern and transparency of the material will be more helpful to your client than a zoomed-out image of the full length of the curtain panel.

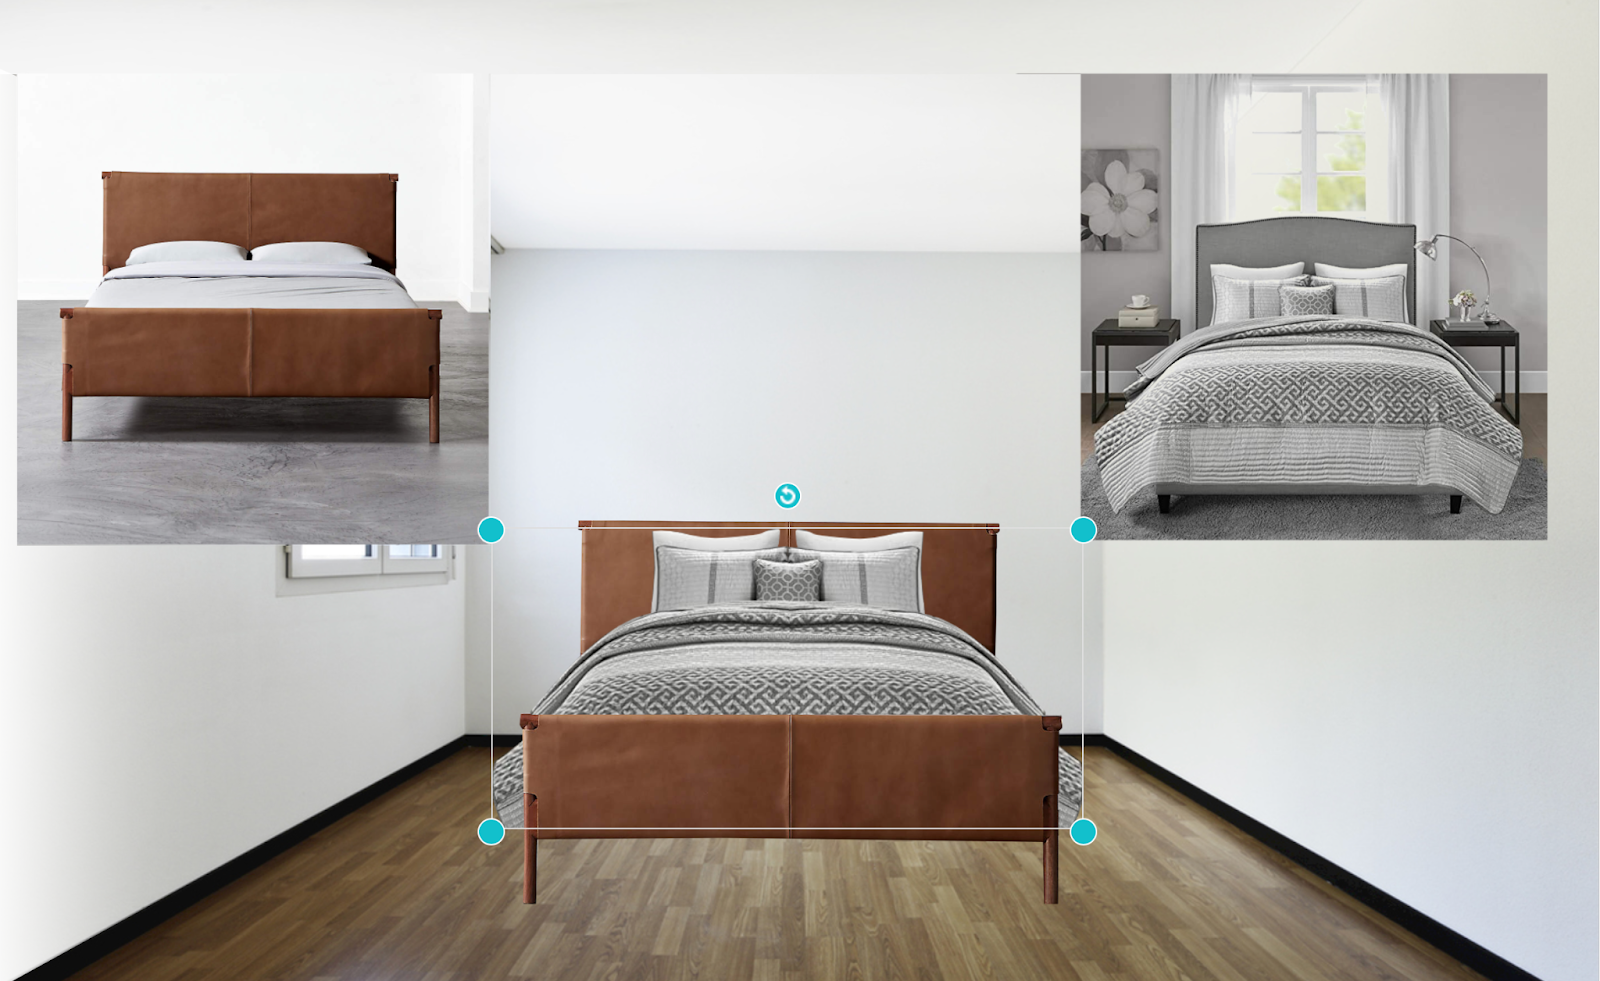
Step 5. Use tracing and cutting tools to pull out the right details
You can also use layering to pull out the right details that you want from a certain product shot. For example, you might to showcase the headboard and footboard of a bed, but not the bedding. Or the reverse might be true, and you want to add the bedding from one image to the bed that you’ve chosen.
Do this with automated tracing and use two to three image layers to get it just right.
PHASE 2: Layout and hierarchy
Once your products are ready, how you arrange them determines how easily clients understand the vision. Clear hierarchy and thoughtful layout guide the eye, highlight key decisions, and reduce second-guessing.
Step 6. Align swatches and products in classic moodboards
Now it’s time to arrange all of those details.
You want to make it easy for your client to envision the overall feel of the space. If your moodboard is cluttered and messy, you’ll only confuse your client.
To keep it from looking busy, line things up nice and neat in rows, like this example:

As you can see, there is one column for paint and material swatches, one column for large furniture, one column for medium-sized accessories, and one column for small accessories.
This organization makes your moodboard easy on the eyes (and the brain).
Step 7. Make sure swatches are the same size
You should also have your swatches be the same size, even if one paint color will be used on a lot more space.
Remember, your full-room moodboards and 3D renderings are where clients will see how each item will be used to scale.
For your classic moodboards, go for size uniformity so your client can see the color in more detail, and without any shadows or perspective shifts.
Step 8. Resize important products to stand out larger than life
After you’ve got all of your pieces arranged, step back. Is having everything in line a little too boring? Do you need a focal point? Maybe you could take an accent chair or other element and up the size to help it stand out.
With classic moodboards, don’t worry about scale. You have the opportunity to highlight any product or swatch. So go for it.
Choose a lighting fixture or accessory that will have a big impact on the overall vibe of the space and resize it to make it larger than the surrounding products (even if it will be smaller in real life).
PHASE 3: Accuracy and polish
Now it’s time to refine. Small adjustments to color accuracy, scaling, and presentation details can be the difference between “I’m not sure…” and a confident yes.
Step 9. Use image editing tools to make your photos more true-to-color
Maybe you went to a showroom and noticed that the couch you chose looks different in person than the online photographs. Or maybe you have plans to do some custom upholstery.
Whatever the reason, if you’re concerned that your moodboard doesn’t showcase the true-to-life color of a product, then you can either edit the photo of that product to adjust the color or add a more realistic swatch.
For example, we’ve added a fabric swatch over the two chairs in this moodboard to indicate what the exact fabric and color will look like.

Step 10. Make sure the finished moodboard is in line with your brand
Your interior design moodboards should always be on brand. This is in terms of design style and color, as well as your company branding. You might want to add your logo and a branded project title to every design.
You might also want some uniformity in terms of how you present your designs, like this example where the swatches are presented on the side of the full-room moodboard.

Inside of DesignFiles, you can create moodboard templates to make it easy to generate on-brand designs every time.
Step 11. Give credit where credit’s due
When designing a moodboard, make sure to give credit to any designer or photographer whose work you’re using. If you’re only including product images, don’t worry. You don’t need to credit the brands and manufacturers. But if you add a photo of a plant, for example, make sure to credit that photographer.
Moodboards vs roomboards vs 3D floor plans
Interior designers often use all three of these tools, but they serve very different purposes.
If you use them intentionally, they work together to move a client from inspiration → confidence → approval.
Here’s how they differ:
| Primary Purpose | What It Communicates Best | When to Use It | |
| Moodboard (classic) | Aesthetic alignment | Colors, materials, textures, key products | Early concept phase when defining the overall feel |
| Roomboard (full-room moodboard) | Emotional buy-in | What the space will look like with actual selected products | When presenting final selections for approval |
| 3D floor plan | Layout confidence | Dimensions, spacing, furniture placement, circulation | When confirming scale, flow, and functionality |
Classic moodboards: for aesthetic alignment
A classic interior design moodboard is a curated collage of colors, swatches, materials, textures, and key products arranged artfully, but not to scale.
Its purpose is to clarify the overall atmosphere of a space.
Moodboards are ideal when:
- You’re defining style direction
- You want to narrow down color palettes
- You’re helping clients understand tone and materiality
- You need alignment before selecting every final product
They communicate mood better than 3D floor plans because they focus on detail, like fabric textures, finishes, and subtle color relationships.
Designers often use a digital moodboard editor to arrange products cleanly and remove distracting backgrounds so clients focus only on what matters.
Learn more about our moodboard editor here.
Roomboards (full-room moodboards): for emotional buy-in

A roomboard shows the space as if the client were standing in it. Products are placed in perspective against an empty room background so the design feels real and immersive.
Unlike a classic moodboard, a roomboard is arranged to reflect scale and placement visually, even if it’s not a fully rendered 3D model.
Roomboards are especially useful when:
- You’re presenting final selections
- You want to show the exact products being specified
- 3D models aren’t available for certain items
- You offer lower-cost e-design packages without full 3D rendering
Because you control the first visual impression, roomboards are powerful for approvals. Clients can see their future space, not just a collection of beautiful pieces.
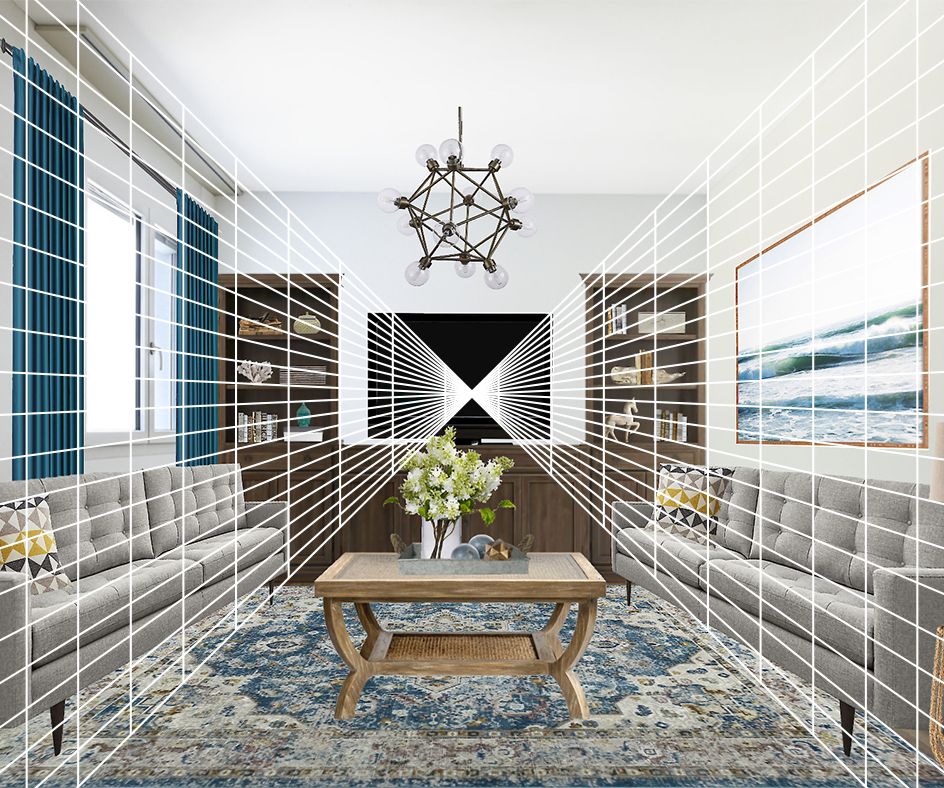
Basic roomboard workflow
Creating a roomboard typically involves:
- Starting with an accurate empty room image (a client photo or export from 3D software)
- Adding a perspective grid for alignment
- Applying wall colors, flooring, and architectural details
- Placing main furniture pieces
- Adding décor and finishing touches
Check out these tutorial for a more in-depth look at this process:
Many designers create their background scene using 3D floor plan software, then export the empty room as a JPG to build the roomboard on top of it. Roomboards can also be created in place of 3D floor plans for lower-cost e-design services.
3D floor plans: for layout confidence
3D floor plans focus on functionality.
They allow clients to:
- Understand spacing and scale
- Visualize furniture placement
- Confirm walkways and circulation
- View the room from multiple angles
While moodboards clarify style and roomboards build excitement, 3D floor plans reduce practical hesitation. They answer the “Will this actually fit?” question.
For full-service projects, many designers use all three:
- Moodboard → define direction
- Roomboard → present final selections
- 3D floor plan → confirm layout and proportions
Used together, they create clarity at every stage. That clarity leads to faster approvals and fewer revisions.
Explore our 3D floor planner here.
Moodboard tutorials using popular design platforms
Looking for easy instructions?
We’ve got you covered with the step-by-step process for designing moodboards using popular online tools.
How to make an interior design moodboard with DesignFiles
DesignFiles’s moodboard software comes fully equipped with a product library featuring 750,000+ items to make it super easy to source great products for your designs.
With DesignFiles, you also get an easy-to-use 3D floor planner and client management tools to complete your entire design workflow from start to finish.
Here’s how to create a moodboard with DesignFiles:
- Login and head to your DesignFiles dashboard.
- Click on Designs then Add Design.
- Select Moodboard / Roomboard.
- If creating a roomboard upload an image or select one from the Empty Room Library, otherwise use the blank canvas.
- Search for vendors and products to use in the Product Library.
- Drag and drop products where you want them, using the automatic background removal tool as needed.
- Add paint swatches from the Paint Color Library.
- Rearrange and organize your moodboard until it’s perfect.
How to make an interior design moodboard with Canva
Canva is a free graphic design tool that can be used to create just about anything. While it’s not designed specifically for interiors, you can use it to create a moodboard. Because it doesn’t have a product library built in, you’ll need to download images from vendors and upload them into Canva.
Here’s how to create a moodboard with Canva:
- Login and head over to your Canva dashboard.
- Click on Create a design in the top right-hand corner.
- Choose Custom size and enter the width and height (we recommend 900 x 700 pixels)
- Source products online and save the images.
- Click on Uploads to add the photos of the products you want to use.
- Source paint swatches online and save the images.
- Click on Uploads to add your paint and material swatches.
- Rearrange and organize your moodboard until it’s perfect.
If you want to skip Photoshop, Canva workarounds, and disconnected tools, this is exactly where DesignFiles fits into the process.
How to make an interior design moodboard with Spoak
Spoak offers a moodboard creator inside of its interior design platform. The software also includes features to help new designers source inspiration and set up an online portfolio.
Here’s how to create a moodboard with Spoak:
- Login and head over to your Spoak dashboard.
- Click Design and then Moodboard.
- Click Config then Add gridlines and upload a background image or alter the background canvas as desired.
- Click Product to source items.
- Rearrange and organize your moodboard until it’s perfect.
5 examples of great interior design moodboards
Looking for inspiration?
Check out these examples of beautiful interior design moodboards.
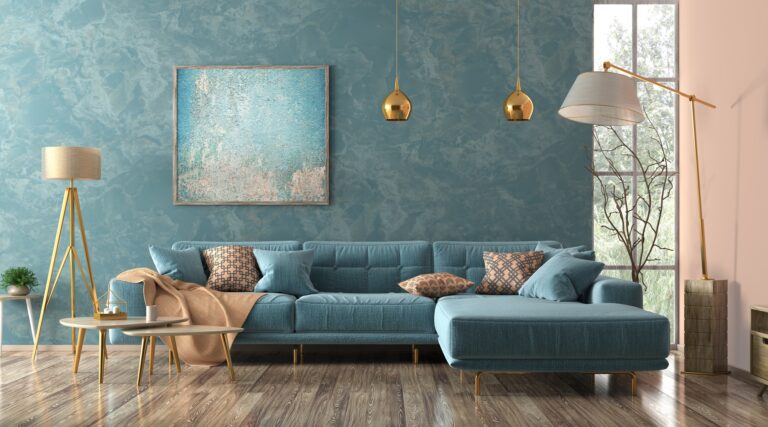
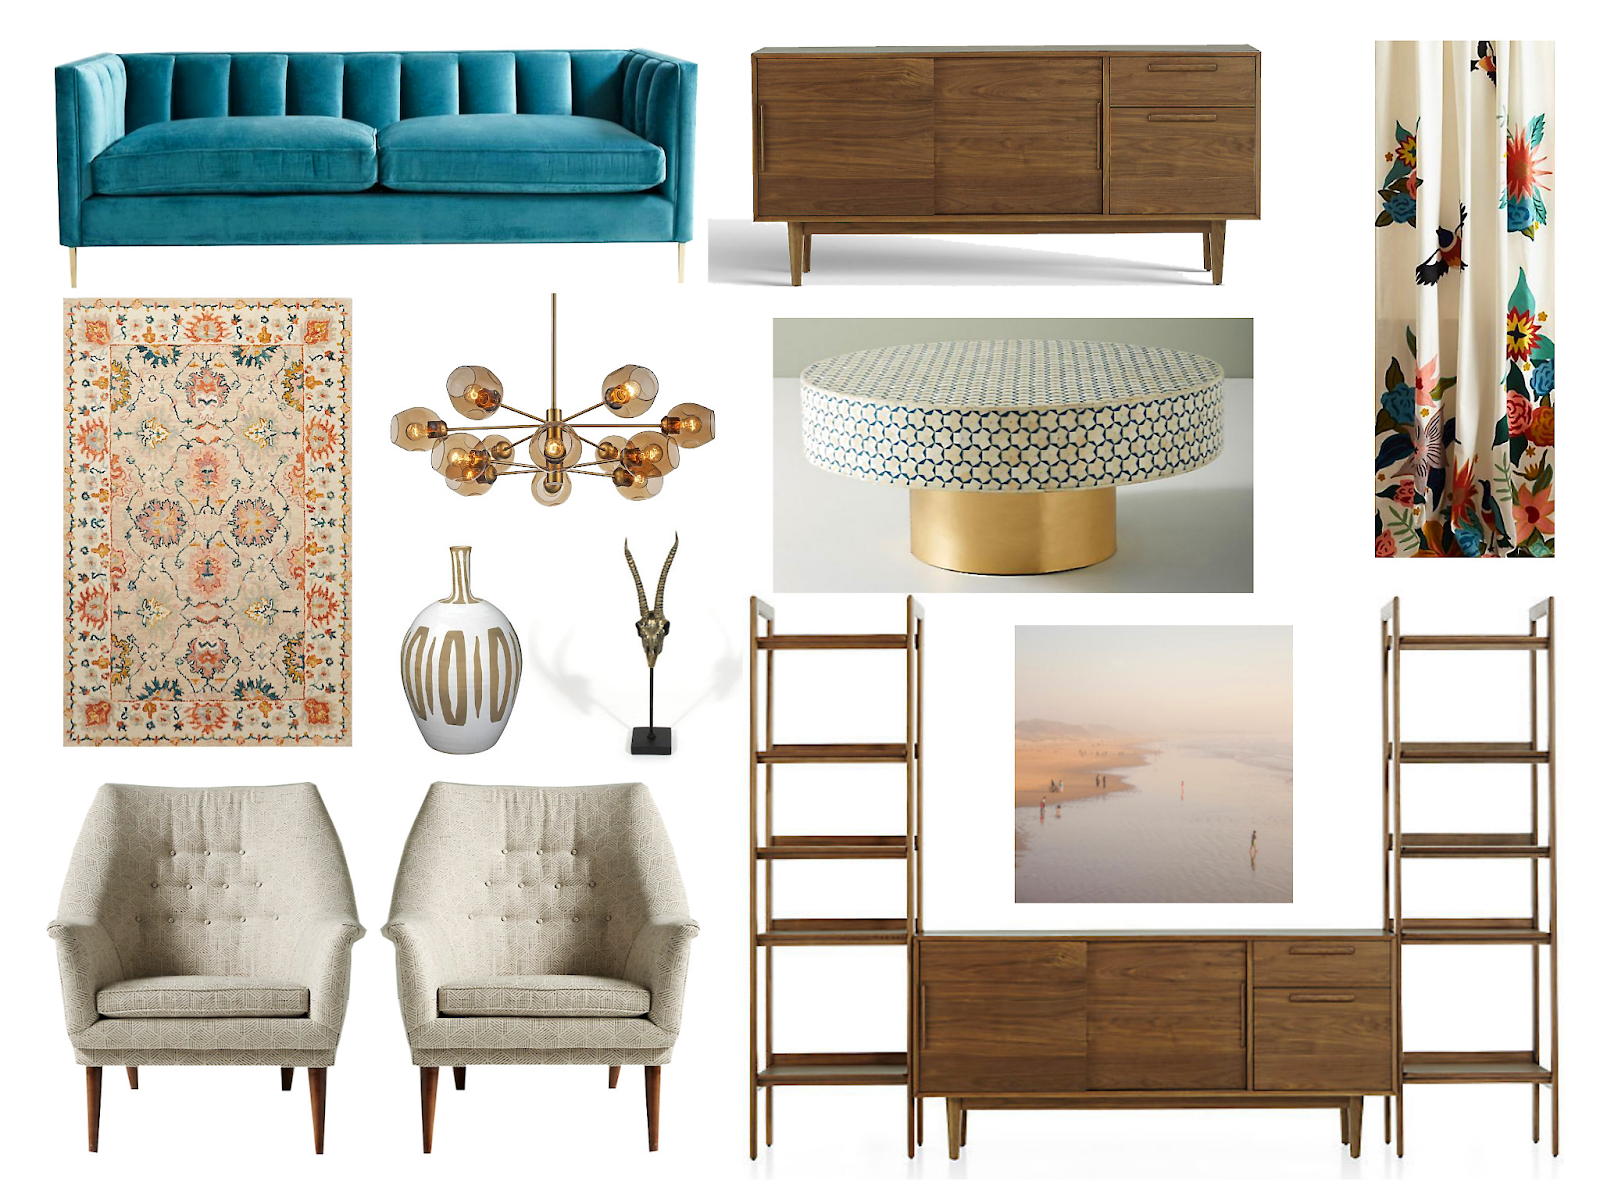
1. Mid-century modern moodboard with gold accents
This classic moodboard makes it easy to hone in on the details of the recommended furniture items and accents. It features a velvet sofa, a mid-century modern entertainment console, and vibrant gold accents for a classy, boho look.
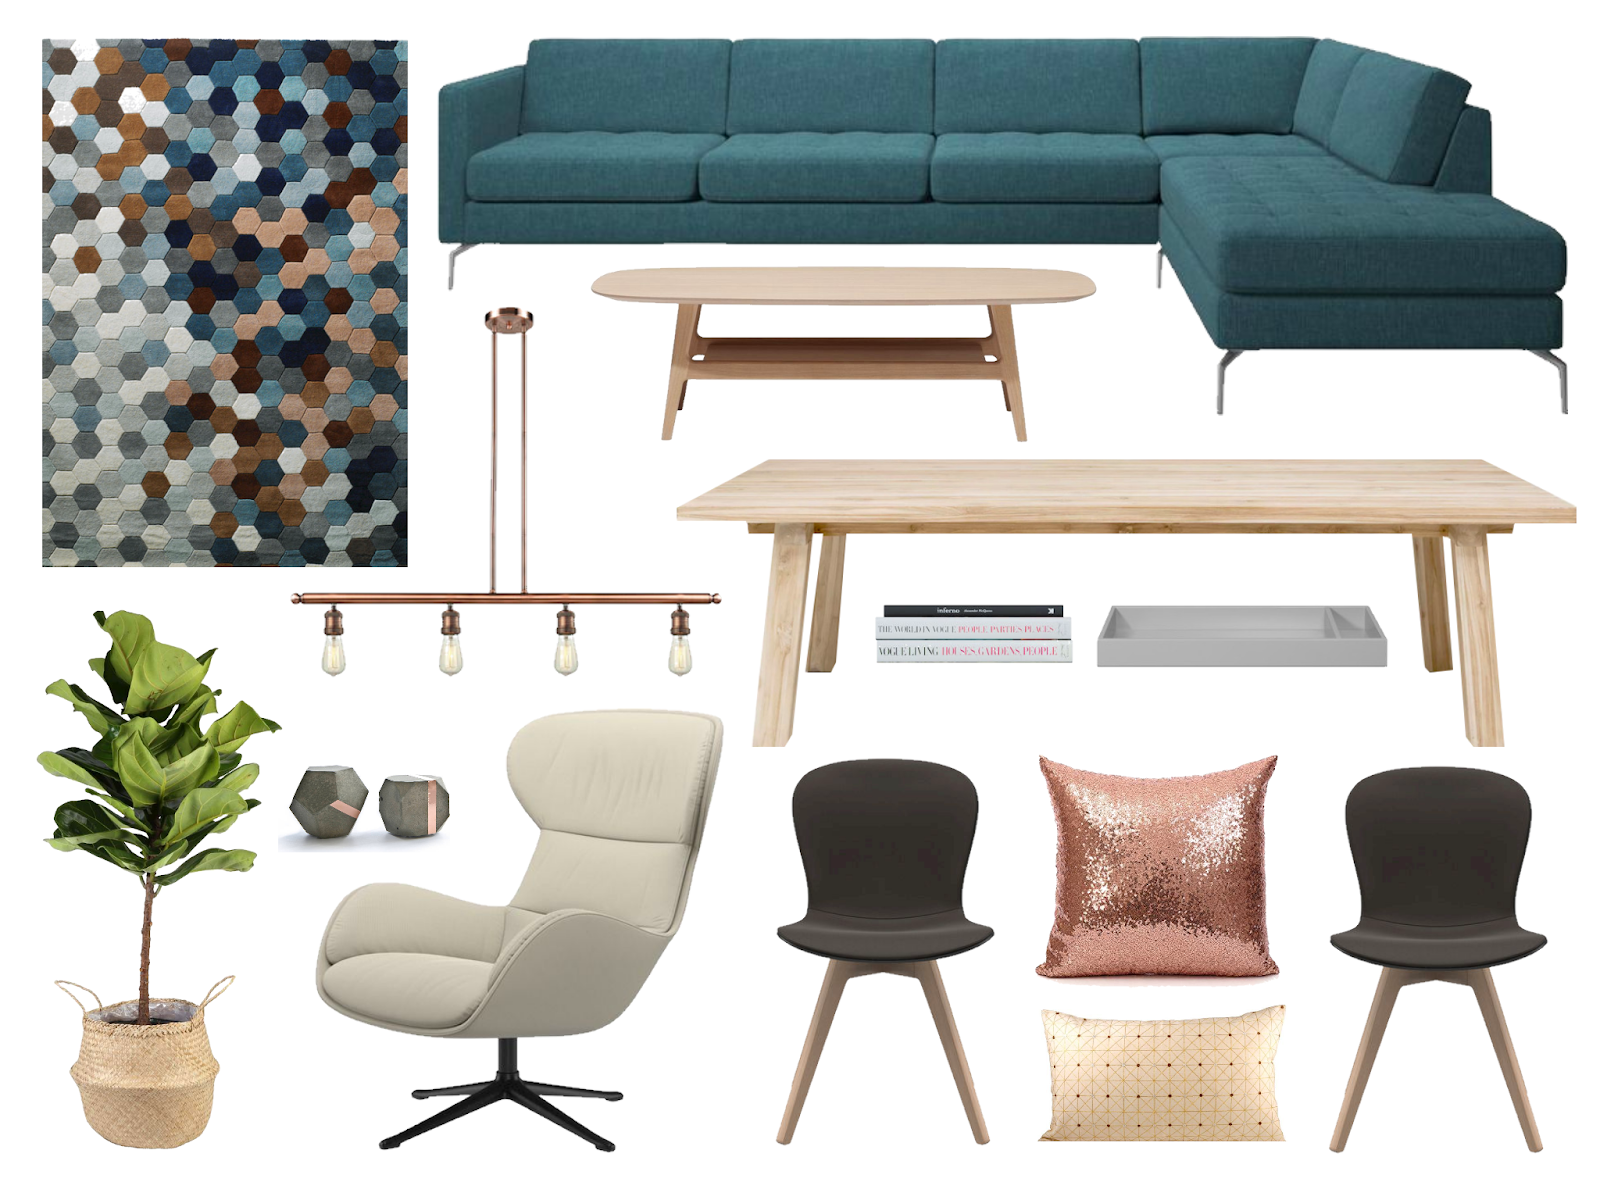
2. City living, open concept moodboard
This full-room moodboard makes it easy to envision what the finished space will look like. With the open living and dining concept, it’s important for the client to be able to visualize how all of the design elements will fit together. This moodboard features a curved floor lamp, luxe hexagon-patterned rug, and an 8-seater dining table.

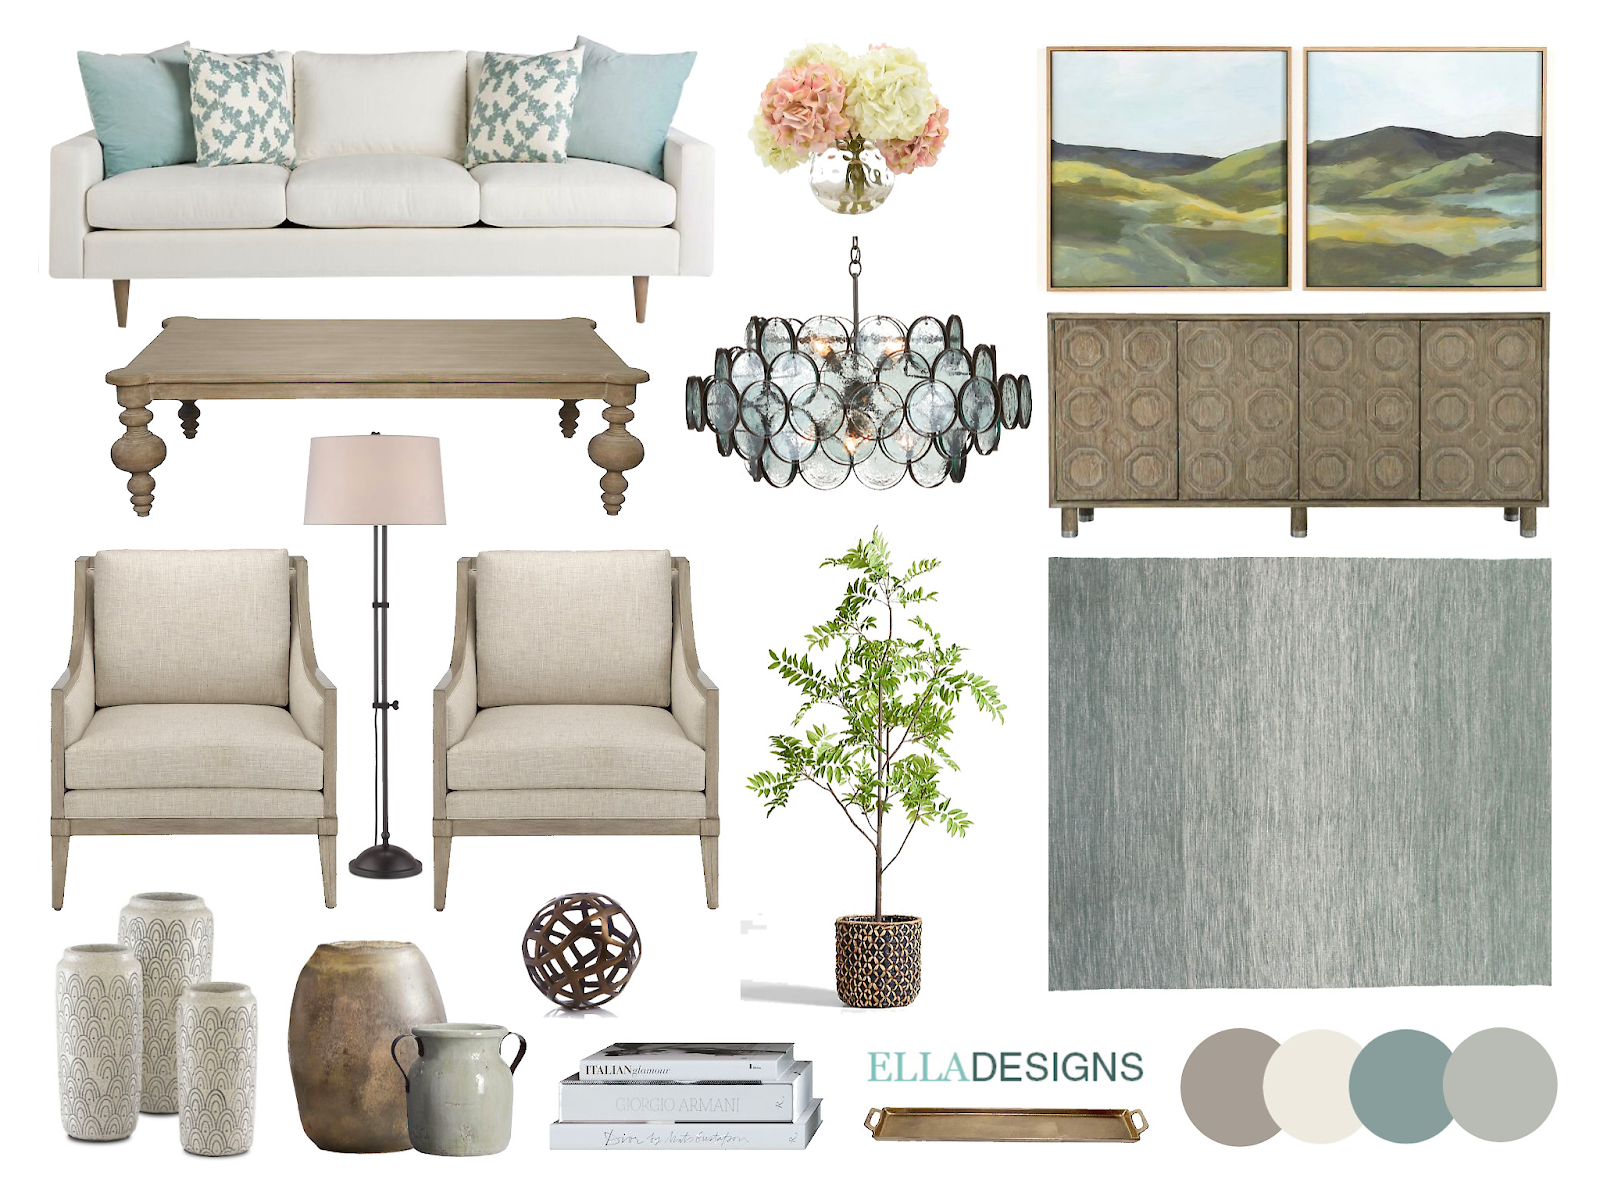
3. Cozy coastal moodboard
This classic moodboard offers a crisp but cozy coastal design. You can easily see how the colors and tones of the furniture will play well together, and the designer has also included paint swatches to show the main colors of the room.
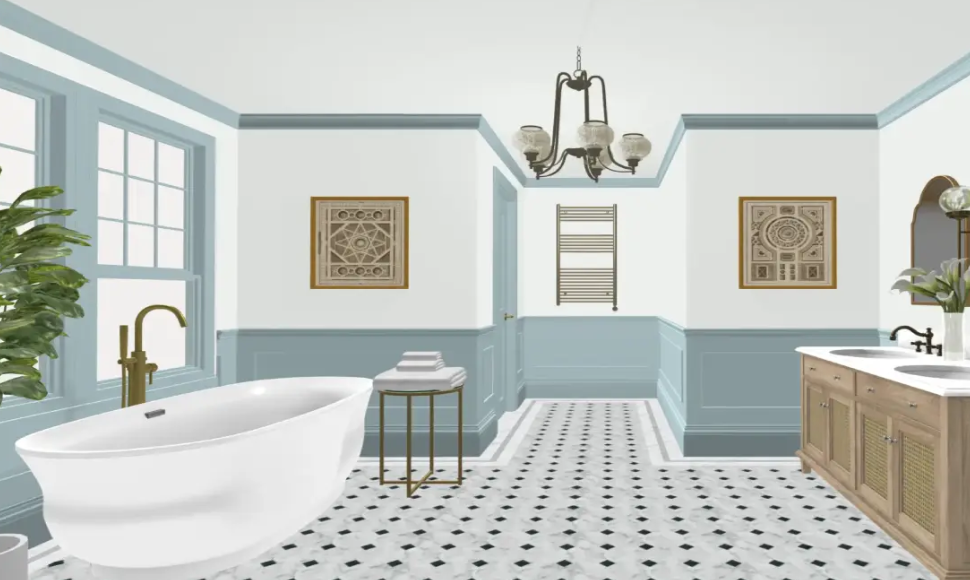
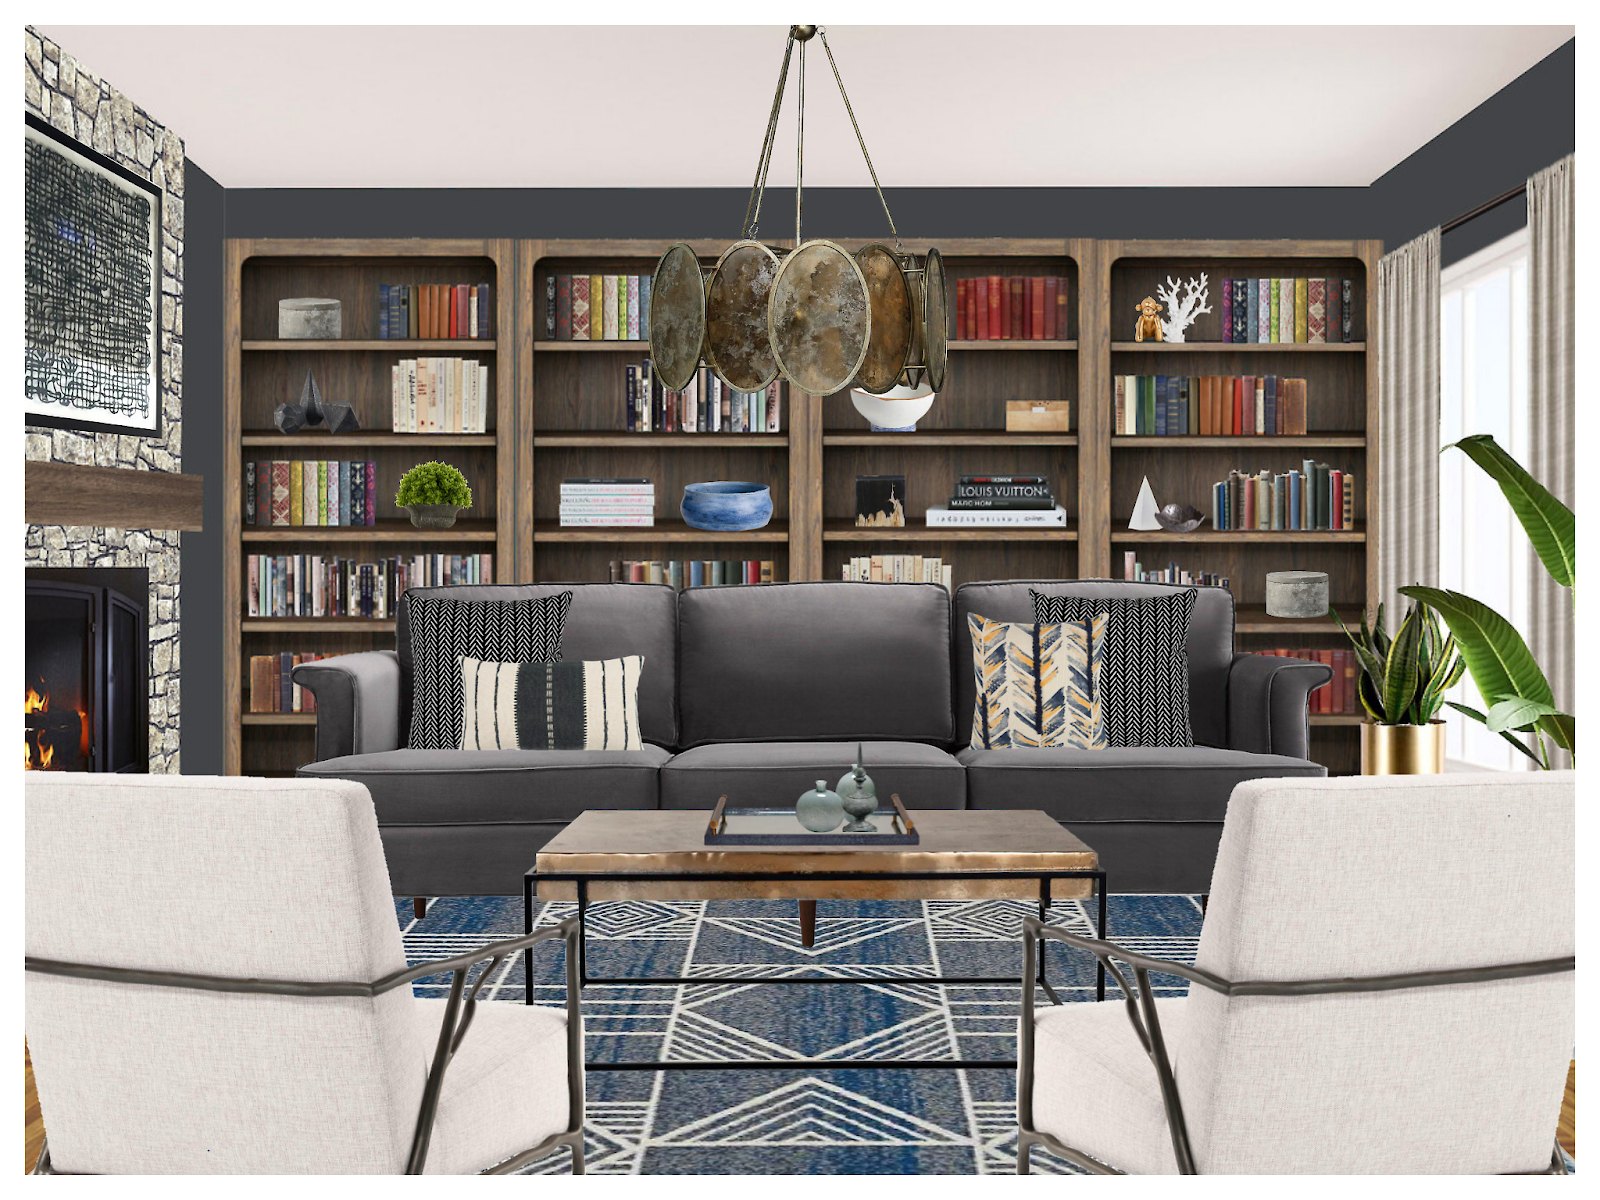
4. Earthy library moodboard
This full-room design offers the perfect balance between feminine and masculine. The room feels very grounded yet soft and cozy. A custom fireplace and built-in shelves add a luxe feel to the space.
5. Scandinavian moodboard with walnut furniture and clean lines
Perfect for the minimalist client, this moodboard showcases a sturdy cream sofa and a walnut coffee table and console. There are just a few choice accent pieces, like mix-matched lamps and planters.

Common moodboard mistakes that slow down approvals
Even talented designers can unintentionally create moodboards that confuse clients instead of guiding them.
If you’ve ever presented a board and gotten “Can we see another option?” when you thought you nailed it, one of these might be the reason.
Let’s fix that.
1. Overloading the board with too many styles
It’s tempting to include every beautiful idea that fits somewhere in the concept. But when a moodboard mixes modern, traditional, coastal, and glam all at once, clients don’t see versatility, they see uncertainty.
Strong moodboards feel intentional.
Pick a direction. Refine it. Edit ruthlessly.
Clarity builds confidence.
2. Mixing inspiration images with actual product selections
This one is sneaky.
If half the board is styled Pinterest inspiration and the other half is real, purchasable products, clients don’t always understand what’s conceptual and what’s being specified.
That disconnect creates hesitation.
If you’re presenting final selections, show the actual items. Inspiration images are powerful early in the concept phase, but when it’s time for approvals, specificity matters.
3. Not showing real products clients can buy
A moodboard full of vague “lookalike” items makes it harder for clients to commit.
They may love the vibe, but without seeing the real sofa, the real lighting fixture, the real rug, they can’t fully say yes.
When your moodboard connects directly to actual products (with specs, pricing, and sourcing ready to go), you remove friction from the decision process.
And fewer questions mean fewer revisions.
4. Using tools that don’t connect to the rest of your workflow
If you’re building moodboards in one program, tracking products in another spreadsheet, managing approvals in email, and sending invoices somewhere else… things get messy fast.
Disconnected tools lead to:
- Missing product details
- Version confusion
- Extra back-and-forth
- Rebuilding the same board twice
Your moodboard shouldn’t live in isolation. It should connect seamlessly to your product lists, presentations, approvals, and purchasing process.
When everything flows together, you spend less time reorganizing and more time designing.
Frequently asked questions about interior design moodboards
A moodboard is a curated collage of colors, materials, and key products arranged to define the overall aesthetic of a space. A roomboard places those products into a realistic room scene with perspective, helping clients visualize how the final design will actually look and feel.
Yes, many interior designers use moodboards alongside 3D renderings. Moodboards clarify style, materials, and product selections, while 3D renderings confirm layout, scale, and placement. Together, they provide both emotional inspiration and practical confidence before clients approve the final design.
A professional interior design moodboard should include a cohesive color palette, material and fabric swatches, key furniture pieces, lighting, finishes, and relevant accessories. When presenting final selections, designers should use real, purchasable products to reduce confusion and support faster client approvals.
Most designers present one strong, well-edited moodboard per space to avoid overwhelming clients. If multiple directions are necessary, limit them to two clearly distinct concepts. Too many options can slow decision-making and lead to uncertainty rather than confident approvals.
Interior designers use a range of tools for moodboards, including Canva, Adobe Illustrator, and specialized interior design software. Professional platforms designed specifically for designers streamline product sourcing, background removal, presentations, and client approvals within one connected workflow.
Create stunning moodboards and moodboard templates with DesignFiles
DesignFiles is trusted by more than 6,000 interior designers who want their presentations to look polished, feel professional, and move projects forward faster. Instead of juggling disconnected tools, you can create moodboards, roomboards, floor plans, product lists, invoices, and client approvals all in one streamlined workflow.
We have a 4.6 star rating on Capterra. Designers consistently highlight how much time they save and how much smoother client communication becomes. One user shared that DesignFiles “significantly cuts back on the time needed to create mood boards and presentations,” while another noted their business increased by 25% after implementing it. Many love how clients can review designs and give feedback in one place, with no messy email chains required.
Whether you offer e-design services, full-service interior design, or manage trade ordering and purchasing, DesignFiles helps you present beautifully and operate like a true professional, from concept to final approval.
Ready to start creating professional moodboards the easy way? Learn more about DesignFiles and sign up for a free trial.