Accurate interior measurements are critical to the success of any design. Whether you’re ordering custom furniture or planning a complete renovation in one of 2025’s top interior design styles, knowing how to measure a room with precision is a must-have skillset. Even the most elegant designs can fall apart if the furniture doesn’t fit or the cabinetry interferes with door swings.
We’ve compiled this comprehensive guide to walk you through the best way to accurately capture the most critical dimensions of any type of space. Use it to gather interior measurements that will not only enable you to plan with precision, but will hold up on installation day, ensuring every aspect of your vision is flawlessly implemented.
Table of Contents
Ready to master interior measuring? Try our free guide
Check out our Interior Measuring Guide. It’s packed with expert tips, printable checklists, and room-by-room cheat sheets to help you measure faster and with greater confidence.
Download Our
Free Room Measurement Guide
- No second-guessing: Measure walls, windows, and ceilings accurately
- Includes a printable worksheet for every room
- Simple enough for clients, detailed enough for designers
- Cuts down on return trips and measuring mistakes
Where interior designers
come to get organized
Measurement tools every interior designer needs
While the traditional tape measure is still a must-have, today’s interior designers can take advantage of modern tools that make measuring faster and more accurate. Using the right tools can help you work more efficiently and avoid costly mistakes, especially on larger or more detailed projects.
Helpful tools include:
- Certified tape measures for reliable, consistent measurements.
- Laser distance meters for quick and precise readings, especially across rooms.
- Digital angle finders and levels to check if walls, ceilings, and surfaces are straight and aligned.
- Smartphone apps with AR measuring features, such as RoomScan Pro or Magicplan, to quickly draft floor plans.
- CAD or BIM software to turn measurements into detailed plans or 3D models.
- Floor Plan Symbol Guide to help you interpret contractor drawings and site notes—DesignFile’s Floor Plan Symbols guide is a great resource.
Pro tip: For older homes or renovations, consider bringing a measuring square to verify the squareness of the room. Walls are rarely perfectly aligned, and if there are significant inconsistencies, they should be noted in your floor plans.
How accurate are digital measuring apps for interior designers?
That’s a good question. Here’s the short answer: they’re helpful, but not perfect. Let’s break it down more practically:
Phone/Tablet-Based Apps (LiDAR or Camera Scanning)
Examples: MagicPlan, RoomScan, Canvas, iPhone Measure app
- Accuracy: With newer LiDAR-equipped devices (like iPad Pro, iPhone Pro models), accuracy can be within ±1–2% under ideal conditions. Non-LiDAR apps (camera-only AR scanning) have greater variance — often ±3–5% or more, depending on lighting, surfaces, and how steady the user is. Large open spaces or tight corners can skew results.
- Good for: Quick room dimensions, rough floor plans, early concept phases.
- Limitations: Not accurate enough for detailed millwork, custom cabinetry, or precision installs. Always verify critical measurements manually.
Laser Distance Meters with App Integration
Examples: Leica DISTO, Bosch GLM with Bluetooth
- Accuracy: Extremely accurate — within millimeters (±1–2mm) when used properly. Great for professional interior design work, especially when paired with an app that builds the floor plan as you measure.
- Good for: Precise wall-to-wall measurements, furniture layouts, and installation-ready floor plans.
- Limitations: Requires manual effort to measure each wall, window, door, and detail. Some learning curve with app integrations.
Full 3D Scanning Systems (Pro Level)
Examples: Matterport, Leica BLK
- Accuracy: Highly accurate, with sub-inch tolerances for most spaces. Produces full 3D models — ideal for complex or large-scale projects.
- Good for: Large commercial jobs, complex remodels, remote collaboration.
- Limitations: Expensive equipment that’s overkill for many residential projects.
👉 Practical rule of thumb: Use digital apps for speed and convenience, but verify critical dimensions manually before finalizing designs, custom orders, or installs.
Bottom line for interior designers
| Type | Good for | Accuracy | Should you trust it alone? |
| Phone apps (camera) | Quick sketches | ±3 – 5% | No |
| LiDAR apps | Quick, better sketches | ±1 – 2% | Verify |
| Laser apps | Detailed floor plans | ±1 – 2mm | Yes |
| 3D scanners | Large, complex jobs | Sub-inch | Yes |
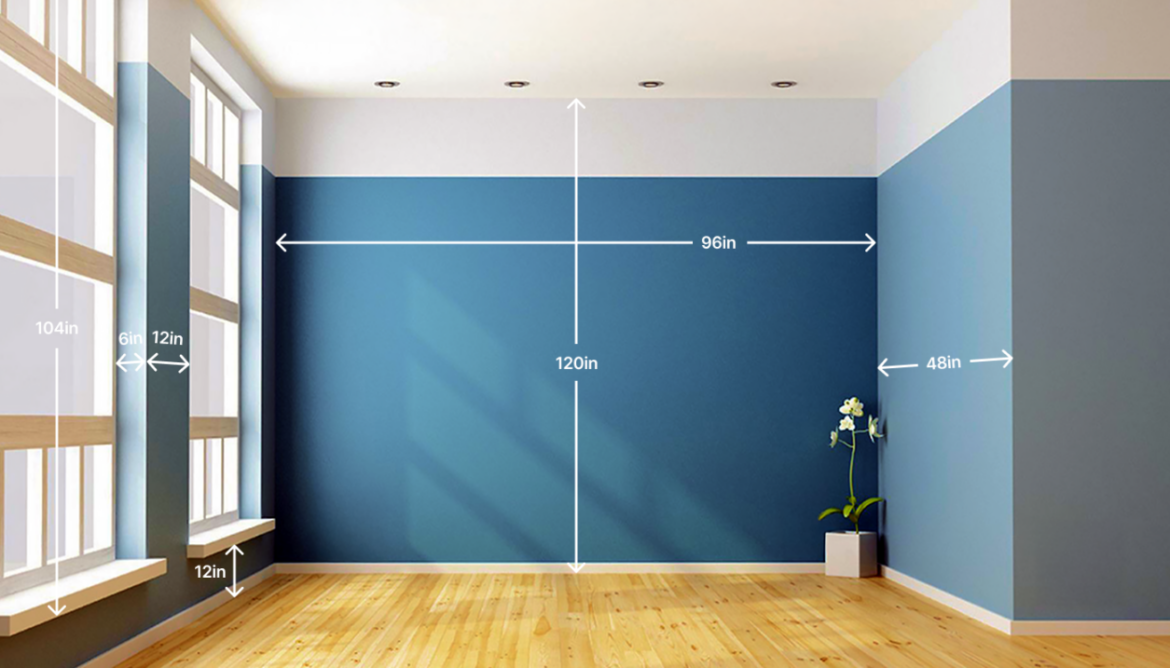
How to measure a room
Use this step-by-step method to ensure accuracy.
- Sketch the Floor Plan: Draw the perimeter of the room. Don’t worry about accuracy at this point.
- Measure Walls: Measure each wall from corner to corner, from baseboard level to keep things consistent.
- Measure Ceiling Height: Include soffits and dropped ceilings.
- Measure Openings: For window and door measurements, include width, height, casing specs, and the distance from the floor and nearest wall.
- Account for Fixtures: Measure built-ins, radiators, vents, switches, and outlets.
- Diagonal Checks: Measure corner-to-corner diagonals to check for squareness.
- Note Architectural Features: Columns, niches, sloped ceilings, or other architectural elements should be included with dimensions.
Pro Tip: Measure twice to be certain of your data before transferring to your floor plan.
Common mistakes to avoid:
- Measuring only one dimension (width without height/depth, etc.).
- Forgetting to account for trim.
- Ignoring site-specific factors like sloped floors or uneven ceilings.
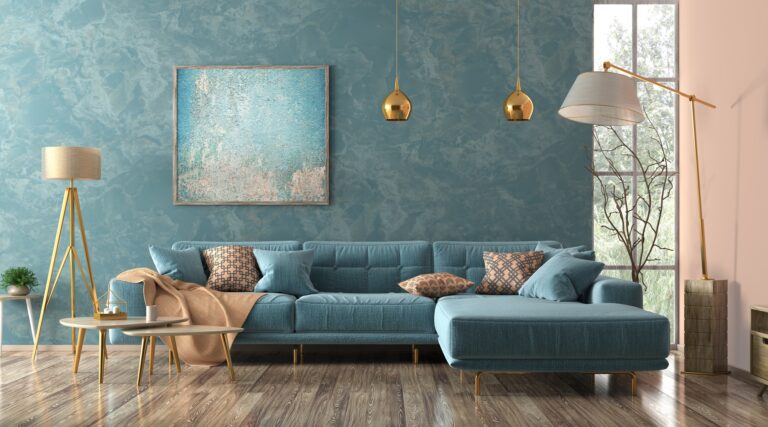
How to measure living rooms
The living room is a multifunctional space, used for relaxation, entertainment, and everyday living. Precise measurements ensure each function fits comfortably without overcrowding the room.
Key tips:
- Always measure from wall to wall, but also record usable space—subtract architectural intrusions like fireplaces, columns, or built-ins.
- Ensure a minimum of 30–36 inches of clearance for traffic pathways between furniture.
- Measure window height and width for proper curtain rod placement, especially when framing views or controlling natural light.
- Measure and record electrical outlet placement when planning lighting and media equipment.
- Note ceiling height variations for hanging fixtures or ceiling fans.
Design advice: Lay out primary seating and conversation areas first, then layer in secondary elements like side tables or accent chairs. If your measurements are precise, you can do this well before bringing the furniture into the house.
How to measure kitchens:
Kitchens require highly technical measurements due to the demands of cabinetry, plumbing, electrical, and appliance requirements.
Key tips:
- Measure from floor to ceiling, including bulkheads or dropped ceilings, and note any uneven flooring.
- Allow 15–18 inches between the countertop and upper cabinets.
- Ensure 42–48 inches of clearance between islands and other counters for comfortable working space and appliance door swing.
- Measure and take note of all mechanicals: water lines, gas valves, ventilation ducts, and outlet locations.
Design advice: Measure and record plumbing centerlines and hood vent pathways early in the project to avoid rework or redesign late in the process.
How to measure bathrooms
Bathrooms are often compact, but they’re also highly detailed spaces. They require accuracy in layout, fixture, and finish planning.
Key tips:
- Measure wall-to-wall and record vertical dimensions for mirrors, lighting, and shower enclosures.
- Ensure a minimum of 15 inches from the toilet’s centerline to any wall or obstruction.
- Shower openings need at least 30 inches of clear width; 36–42 inches is preferred.
Design advice: Measure the floor slope to confirm drainage direction and avoid future water damage.
How to measure bedrooms
Comfort, storage, and circulation drive bedroom design. As you measure, focus on areas that balance function and aesthetics, like bed size, usable storage, and walkways.
Key tips:
- Measure the full wall length, including alcoves or recesses that may be ideal for wardrobes or desks.
- A queen bed is typically 60″ x 80″—allow at least 24 inches of clearance on each side.
- Measure window height and wall width for headboard or curtain alignment.
- Record closet dimensions, including interior depth, door swing, and shelving height.
- Consider wall height and slope in attic or loft bedrooms—this affects headboard selection and wall decor.
Design advice: Include walking clearance at the foot of the bed. 30–36 inches is ideal for user comfort and room flow.
How to measure furniture
Getting furniture measurements right is about more than size; it’s about fit, flow, and function. Accurate measurements help you avoid surprises, saving time and reducing stress during the interior design installation stage.
Key tips:
- Record width, depth, and height for every piece of furniture, including legs and arms.
- Measure pull-out dimensions for extendable tables, sleeper sofas, and drawers.
- Check doorways, hallways, stairwells, and elevators for delivery feasibility.
- Allow 16–18 inches between seating and coffee tables, and at least 3 inches between furniture and walls for breathing room.
- Note visual weight—oversized furniture may technically fit, but overwhelm a room if not well-proportioned.
Design advice: Create full-size cardboard templates of large pieces to test arrangements in real time, or use AR tools to simulate in scale.
Once you have your measurements, bring them to life
Accurate numbers are only the start. Once you’ve measured every wall, window, and angle, you need to turn those figures into something your clients can actually see and approve. That’s where DesignFiles comes in.
With DesignFiles, you can easily draw floor plans from scratch in the 3D floor planner. It’s simple to use and doesn’t require you to be AutoCAD genius. You can add all your structural elements, customize surfaces and pull in products and decor from a large library of 3D models to quickly experiment with different layouts and create a space your clients will love.
From moodboards and questionnaires to product sourcing, tear sheets, invoices, and purchase orders, everything lives in your DesignFiles workspace, ready when you are.
Turn your accurate measurements into designs your clients will love. Try DesignFiles for free today.