Every interior design project starts with excitement. You meet a new client, discuss beautiful ideas, and begin imagining the transformation of their space. Before the moodboards and floor plans begin, there is one important step that sets the tone for everything that follows. That step is your design contract.
A thoughtful contract is not about making things complicated or intimidating. It is about clarity, confidence, and professionalism. When expectations are clearly written and agreed upon, both you and your client can focus on the creative work instead of worrying about misunderstandings.
Your interior design contract outlines how the project will work from start to finish. It explains the services you provide, the responsibilities of the client, how payments will be handled, and how decisions will be made along the way.
We’ve built contract tools alongside more than 6,000 designers on DesignFiles, and the projects that run smoothest almost always start the same way: with a contract that spells out the details most designers don’t think to write down until something goes wrong.
In this guide, we’ll walk through how to write an interior design contract step by step, plus show you what a real template looks like so you’re not starting from a blank page.
If all you want is templates, skip to our guide on the best free and paid interior design contract templates. 🩵
Table of Contents
Why interior design contracts are essential
Interior design contracts create structure and clarity for every project. They act as the roadmap that guides both you and your client from the first consultation to the final reveal.
Without a written agreement, expectations can easily become blurry. Clients may assume certain services are included when they are not. Designers may expect faster approvals or decisions than the client provides. Small misunderstandings can quickly grow into larger problems if there is no document to reference.
A strong contract removes that uncertainty. It explains what services you provide, how communication will happen, and what happens if changes or delays occur.
Contracts also protect your time and income. They outline payment schedules, deposits, reimbursable expenses, and policies for revisions. This clarity helps prevent awkward conversations later in the project.
Finally, a professional contract builds trust. Clients feel confident when they see that you have a clear process and a well organized agreement. It shows that you run a serious business and that their project is in capable hands.
When done well, a design contract does more than protect your business. It creates the foundation for a positive working relationship and a successful project.
What’s the difference between a scope of work and a contract?
These two terms get used interchangeably, but they’re not quite the same thing. A scope of work outlines what you’re going to do: the specific services, deliverables, and timeline for a project. A contract is the legally binding agreement that makes those terms official once both parties sign it.
Some designers write their scope of work as a standalone document referenced inside the contract. Others fold it directly into the agreement. Either approach works, as long as both are clearly connected and signed. What doesn’t work is treating an unsigned scope of work as if it’s binding. Without a signature, it’s a proposal, not an agreement.
How to write an interior design contract in 7 steps
Follow these steps to create a contract that covers your business and kicks your projects off on the right foot.
Step 1: Start with the project overview and deposit
The beginning of your contract should clearly identify the project and establish the agreement between you and your client.
This section typically includes:
- The names and contact information of both parties
- The project location and description
- The start date or estimated project timeline
- The non-refundable deposit required to begin the project
Many designers phrase their deposit clause something like this: “A non-refundable deposit of [amount] is due upon signing and will be applied toward the final invoice.” Language this direct leaves little room for confusion later.
The deposit is doing more work than it might seem. It confirms the client is committed, and it lets you reserve time in your schedule that you’d otherwise be turning away from other clients. Making it non-refundable protects that reserved time if a client changes their mind before work even begins.
Many designers also include a brief project summary at the start of the contract. This overview sets the tone for the agreement and confirms the type of services the client will receive.
Clarity at the beginning prevents confusion later.
Step 2: Spell out the scope of work and deliverables
The scope of work is one of the most important sections of your contract. It describes exactly what services you will provide during the project.
Many design contracts include a detailed Statement of Work inside the agreement, outlining the full structure of the project. Something like:
“On the basis of existing plans or measurements to be taken or confirmed by us, we will prepare a concept board, floor plan, and 3D renderings for your review and written approval.”
Specific language like this, rather than a vague mention of “design services,” is what keeps clients from assuming more is included than what you actually agreed to.
Your scope of work should typically include:
- Project summary. This section explains the overall design project and the spaces that will be included.
- Design services. List the services you will provide, such as concept development, space planning, sourcing, presentations, and installation support.
- Deliverables. Deliverables are the tangible items the client will receive. Examples include moodboards, floor plans, renderings, product lists, and design presentations.
- Timeline and milestones. Provide a general timeline for the project, including major phases and expected milestones.
- Exclusions and assumptions. Clarify what’s not included in your services so there are no misunderstandings.
- Payment schedule. Explain when payments are due throughout the project.
- Final deliverable acceptance. Describe how the client confirms that the design deliverables have been completed and accepted.
When this section is clear, both you and the client understand exactly what the project includes.
E-design vs. full-service: how your scope changes
If you offer both e-design and full-service packages, your scope of work needs to spell out which one applies, because the responsibilities shift significantly between the two.
With e-design, you typically hand the client a shopping list and they take it from there. You’re not responsible for managing orders, shipping, storage, or returns once that list is delivered. With full-service, you’re purchasing on the client’s behalf, which means you’re also taking on the liability that comes with it. If a custom sofa arrives damaged, that’s your problem to resolve under full-service. Under e-design, it’s the client’s.
The same split shows up in pricing. E-design clients usually shop at retail, so you’re not marking up any merchandise, though you can build in affiliate commissions as long as you disclose them. Full-service lets you buy at wholesale or trade pricing and charge the client retail, with the difference counted as part of your compensation.
Getting this distinction into writing early saves you from a conversation later where a client assumes you’re tracking their furniture delivery when your agreement never actually said you would.
Step 3: Set expectations for what the client owes you
Successful design projects rely on collaboration. Your contract should clearly explain what the client is expected to contribute.
This section typically covers:
- Providing accurate information about the space
- Sharing budget guidelines and preferences
- Completing questionnaires or providing inspiration images
- Responding to questions and design approvals in a timely manner
Communication expectations matter just as much. You may outline:
- How often project updates will be shared
- How meetings will be scheduled
- Where feedback and approvals should be submitted
Without this section, it’s easy for a client to assume they can text you at any hour and expect a same-day answer, or that a timeline won’t slip even if they take two weeks to approve a floor plan. Setting these expectations early prevents the kind of quiet scope creep that eats into your margins on almost every project it touches.
Step 4: Set your revision policy before you need it
Design projects often involve revisions as ideas evolve. Your contract should explain how revisions are handled so the process stays organized.
Include details such as:
- The number of revision rounds included in your design services
- How revision requests should be submitted
- Additional fees for extra revisions beyond the included scope
Two to three rounds is a common benchmark for flat-fee packages. If you’ve listened closely to a client’s preferences during discovery, the second round is usually where things click into place. If you’re still making major changes by round three, that’s often a sign of a communication gap worth addressing directly, rather than something to keep billing through indefinitely.
Approvals are another key part of the process. Your contract should explain how clients approve:
- Design concepts
- Product selections
- Purchasing decisions
When approvals are documented clearly, both parties stay aligned and the project keeps moving with confidence.
Step 5: Get specific about fees and reimbursable expenses
Financial clarity is essential for every design contract.
This section explains how your services are billed and what costs clients should expect during the project.
Typical topics include:
- Design fees and hourly rates
- Package pricing if applicable
- Payment schedules and invoice timelines
- Late payment policies
You should also include reimbursable expenses, such as:
- Travel costs
- Printing or materials
- Courier services
- Administrative charges related to project management
A common way to phrase this is to bill reimbursable expenses at actual cost, plus a 15 to 20 percent administrative fee to cover the time spent tracking and managing them. Whatever percentage you land on, put a number in writing rather than leaving it open-ended. Clients are far less likely to question a fee they agreed to upfront than one that shows up for the first time on an invoice.
Step 6: Cover purchasing, shipping, and what happens if something breaks
Many interior design projects involve sourcing and purchasing furniture, finishes, and accessories. Your contract should outline how this process works.
- Purchasing guidelines. Explain whether the designer or the client is responsible for purchasing items, and clarify how proposals and product approvals will work. Most full-service designers require full payment before placing an order, and there’s a practical reason for it: ownership of the item doesn’t transfer to the client until it’s paid in full. If a sofa is damaged in transit and the client hasn’t paid yet, it’s technically still your sofa, and your problem to sort out.
- Shipping and delivery. Describe how shipping, freight, and delivery logistics are handled, including delivery timelines and coordination.
- Storage. Some projects require storage before installation. If applicable, explain how storage fees are managed.
- Damages and claims. Products can sometimes arrive damaged during transit. Your contract should outline how claims and replacements will be handled.
- Insurance recommendations. Encourage clients to maintain appropriate homeowner or renovation insurance coverage for their project.
By covering these details, you help clients understand the realities of furniture procurement and project logistics.
Step 7: Add the legal protections that hold everything together
The final section of your contract protects both the designer and the client by outlining legal and logistical details.
- Working with contractors. Clarify that contractors operate independently and that the designer is not responsible for their work.
- Use of design documents. State that drawings, plans, and design concepts remain the intellectual property of the designer unless otherwise agreed.
- Photography permissions. Many designers include permission to photograph completed spaces for portfolios or marketing purposes.
- Warranties and limitations. Explain that product warranties are provided by manufacturers rather than the designer.
- Liability and indemnification. This section protects both parties if issues arise during the project.
- Site conditions and safety. Clarify expectations for safe access to the project site.
- Change orders. Design projects often evolve. Explain how changes to scope or services will be documented and billed.
- Permits. If permits are required, clarify who is responsible for obtaining them.
- Exclusivity and non-circumvention. If part of your compensation comes from a markup on merchandise, this clause states that clients agree to purchase specified items through you rather than sourcing them directly once you’ve already done the work of selecting them.
- Non-disparagement. This clause asks both parties to avoid posting negative reviews or public complaints without first trying to resolve the issue directly. Enforceability varies by state, so it’s worth a quick check with a lawyer before relying on it.
- Relationship of the parties. Clarify that you and the client have an independent contractor relationship, not an employment or partnership arrangement.
- Governing law and venue. State which state’s laws govern the agreement and where disputes would be handled, typically the state where you do business.
- Attorney’s fees. This clause states that if a dispute goes to litigation, the losing party covers the winning party’s legal costs, which discourages frivolous claims.
- Entire agreement. This clause confirms the signed contract is the complete agreement between both parties, and that any future changes must be made in writing and signed by both sides.
- Ending the agreement. Outline how either party may terminate the contract if necessary.
- Events outside your control. Include language addressing unexpected events such as supply delays or other disruptions.
- Final agreement details. The contract should conclude with signatures from both parties confirming that they agree to the terms.
Get started with a template instead of a blank page
Writing all of this from scratch is a lot to take on for your first contract, which is why most designers start from a template and customize it rather than drafting one from nothing.
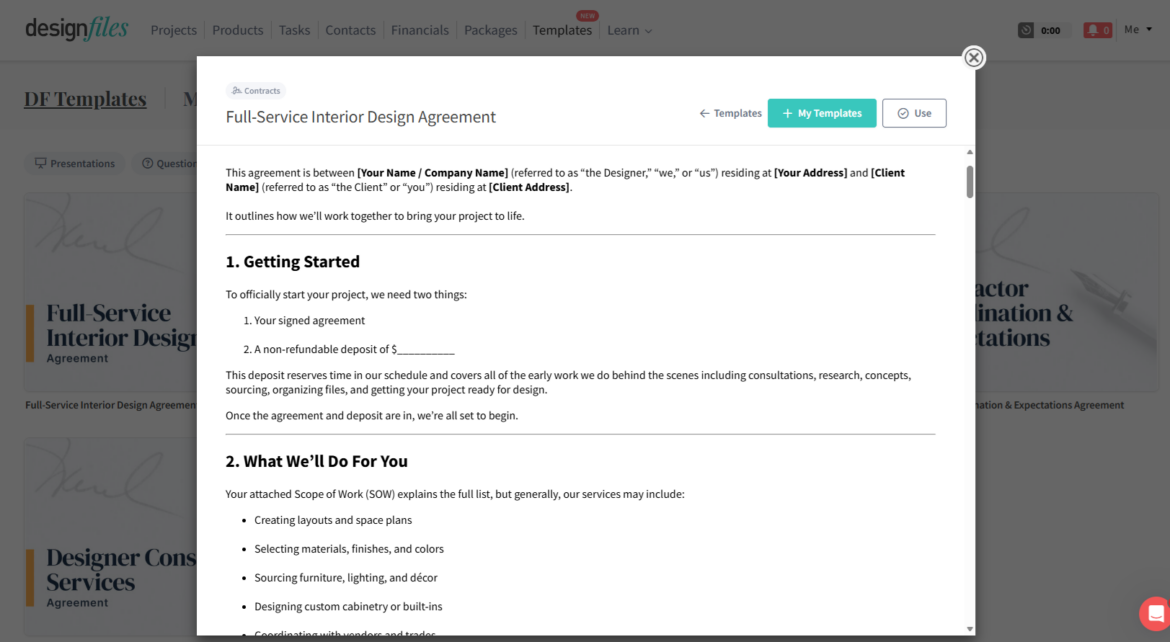
Inside DesignFiles, our Full-Service Interior Design Agreement template already includes every section covered above: scope of work, client responsibilities, revisions, fees, purchasing guidelines, and the legal protections from step 7. You fill in your rates, your policies, and your branding, then send it to your client for an e-signature directly from the platform. If you offer e-design services or need a separate contractor coordination agreement, we have templates built for those too.
If you’d rather compare a few options first, including some from other providers, our roundup of the best free and paid interior design contract templates walks through ten of them side by side.
Join DesignFiles to start using our interior design contract templates and e-sign features!
After you’ve drafted your contract
Getting the wording right is most of the work, but a few practical steps matter just as much before you send anything to a client.
- Check your state’s requirements. Contract law and licensing rules for interior designers vary by state, and sometimes by city. If you work across multiple states, confirm whether any language needs to change depending on where a project is located.
- Have a lawyer review it, especially your first version. A lawyer isn’t just there to catch typos. They’ll check whether your liability and indemnification language actually holds up, whether your termination clause protects you the way you think it does, and whether anything in your state limits what you can enforce, like non-disparagement clauses.
- Don’t skip the signature. A contract that isn’t signed by both parties isn’t binding, no matter how detailed it is. Send it early enough that your client has time to actually read it and ask questions, rather than rushing it through right before work begins.
Build your business on the best foundation with DesignFiles and get all of our interior design contract templates included!
Please note: This blog is not intended to be legal advice. To be certain you’re covering all of your bases and protecting your business, please engage a lawyer who can review your contract for best practices, legal protections, and local compliance.
Frequently asked questions about writing design contracts
An interior design contract should include a project overview, scope of work, client responsibilities, revision policies, payment terms, purchasing guidelines, and legal protections. These sections outline how the project will be managed from start to finish and create clear expectations for both the designer and the client.
Yes. A contract should be used for every design project, regardless of size. Even smaller projects benefit from clear agreements about services, payments, and responsibilities. Contracts help prevent misunderstandings and create a more professional experience for both designers and clients.
Most designers create a standard contract template that can be customized for each project. The overall structure remains the same, while the scope of work, timeline, and fees are adjusted to match the specific project.
It is always a good idea to have a legal professional review your contract, especially when creating your first template. Laws and requirements can vary by location, so legal guidance helps confirm that your agreement is appropriate for your region and business structure.
Two to three rounds is typical for flat-fee packages. Beyond that, most designers switch to hourly billing for additional revisions so the extra time doesn’t eat into their margins on the original scope.
Your termination clause should cover this. Most contracts allow either party to end the agreement with written notice, while requiring the client to pay for work completed and any items already ordered on their behalf up to that point.
Get the contract templates, design editors, and project management features you need all in one place. DesignFiles is the top-rated platform for small and solo designers on Capterra. Learn more and start your free trial, which is unlimited for one project at a time.