You know you’re capable of incredible work, but the world won’t know unless you show them. As an interior designer, it’s essential to share stunning images on your social media, website, and portfolio pages.
Before you hit “share,” though, it’s important to make sure the photos you post truly represent your brand. Should you be capturing these shots yourself, or is it time to invest in a professional photographer? DesignFiles allows you to display high-impact portfolio projects directly on your design package landing pages—perfect for showcasing your best work with polished photography that elevates your brand.
In this post, we’ll break down the pros and cons of each approach to help you decide what’s best for your business. Plus, we’ll share tips for taking photos yourself—because, let’s face it, you can’t hire a photographer for every shot that needs to be captured.
Table of Contents
Why interior photography is so important
High-quality photos are one of the most important tools to promote your interior design business. They provide a first impression that speaks volumes about your style, skill set, and professionalism. The right shot can highlight an interior’s unique elements, bringing out its texture, light, and atmosphere in ways that words simply cannot.
But interior photography isn’t just about aesthetics—consider it a vital part of design business strategy. Strong visuals can help you advertise and attract higher-end clients, increase engagement on social media, and make your projects more appealing for press features, awards submissions, and even brand collaborations. They help you communicate your value without saying a word.
Hiring a professional photographer VS. taking photos yourself
In a world filled with high-res phone cameras and free editing apps, it can be tempting to photograph your work on your own. And for quick social media posts, progress updates, or behind-the-scenes pics, DIY shots can do the trick. But when it comes to portfolio-grade imagery that needs to represent your brand, attract high-end clients, or get published, the waters get a little murkier.
Check out the pros and cons of hiring a pro vs doing it on your own listed below to help you decide the best path for your design business.
Hiring a Professional Photographer
Pros:
- Expertise in Composition & Lighting: Professional interior design photographers understand how to compose a shot to enhance the flow and natural focal points of each space. They’re masters of manipulating both natural and artificial light to convey depth and atmosphere—something even the best cameras can’t do without a trained eye.
- High-End Equipment & Post-Production: From tilt-shift lenses that prevent distortion to advanced post-processing that subtly enhances texture and tone, the tools a pro brings to the table are leagues beyond a smartphone.
- Art Direction Collaboration: A good photographer becomes a creative partner. They’ll work with you to understand your design intention and bring it to life in a way that aligns with your brand.
- Credibility & Publication-Readiness: Editorial outlets, awards juries, and high-end clients expect polished, professional imagery. A recognizable photographer can also lend credibility and open doors to press opportunities.
- Consistent Brand Identity: Working with professional photographers ensures a cohesive, high-quality visual identity across your portfolio—an essential element in building trust and brand recognition. This level of consistency is especially critical when targeting luxury clients or seeking editorial features.
- Opportunities for Editorial Features: Editorial features are often completely out-of-reach for designers who use DIY photography, because the majority of publications now rely on designer-provided imagery due to reduced in-house photography budgets.
Cons:
- Cost: Hiring a seasoned interior photographer is an investment. Rates can vary depending on location, scope, and usage rights.
- Scheduling & Logistics: Coordinating schedules, styling days, and shoot timelines can be time-consuming.
- Creative Control (Perceived): Some designers struggle to let go of creative control. The key here is collaboration—it’s easier to work with a photographer who respects your vision and knows how to amplify it.
Taking DIY Photos
Pros:
- Speed & Convenience: If you’re capturing a few details for social media or documenting a work-in-progress, being able to snap a few shots yourself is significantly more efficient.
- Cost-Effective: DIY photoshoots are free, making them a smart choice for low-budget projects or increased profit margins.
- Creative Freedom: You have full control over how you frame your space and tell your story, with no external factors.
Cons:
- Limited Technical Capability: Most interior spaces require careful lighting setups, exposure balancing, and lens correction to look their best—which is hard to achieve with smartphone cameras and basic gear.
- Inconsistency: DIY images often lack cohesive style, which is less than ideal for brand identity.
- Missed Opportunities: Amateur photos won’t meet the visual standards of top-tier publications, awards programs, and luxury clients.
If you’re still unsure of whether to DIY your photography or hire a professional to help you out, ask yourself these four questions:
- What’s the end use for these photos?
If they’re going on your website, going to press, or being submitted for awards, professional photography is a must. But if you’re simply updating Instagram Stories or logging project milestones, DIY is an acceptable alternative. - Is this a high-impact project?
For standout projects that represent a leap in your portfolio—new levels of craftsmanship, a larger scale, or a signature aesthetic—it’s worth investing in visuals that do the work justice. - How much time and energy can you realistically devote?
DIYing a photoshoot might save money upfront, but it takes significant time to style, shoot, and edit effectively. If your schedule is already maxed out, outsourcing may actually be the more efficient choice. - Where does photography fall in your budget? Newer designers may not have the bandwidth to cover professional photography costs, even though this design business expense has the potential to increase your sales in the long run (for more budgeting info, check out our guide to the most common interior design business expenses here).
Ultimately, both DIY and professional photography have their place. The key is knowing when to invest and when to improvise. Our best advice? Be strategic: save the phone shots for quick updates, and let the pros step in when it really matters.
How to take your own photos as a designer
Taking DIY design photos doesn’t have to be daunting, but it does require some planning and attention to detail. Follow these steps to capture the best representation of your work and ensure your images do justice to your design.
- Step 1: Choose the Right Time of Day: Lighting is everything. Natural light is your best friend when photographing interiors, so aim to shoot during the day when the light is bright but not harsh. Early morning or late afternoon (golden hour) is ideal for soft, flattering light. If you’re working with artificial lighting, make sure to balance it with natural light for a more even effect.
- Step 2: Prep the Space: Before you pick up your camera, ensure the space is tidy and ready for close-ups. Straighten furniture, remove clutter, and consider adding or adjusting decor to highlight focal points. Pay attention to small details like throw pillows, light fixtures, and shadows that could distract from the overall aesthetic.
- Step 3: Set Up Your Camera or Smartphone: If you’re using a smartphone, use the grid feature to help you align your shots. Set your camera to the highest resolution, and avoid using the zoom function—this can reduce the image’s quality. If you have a DSLR or mirrorless camera, use a wide-angle lens (ideally around 24mm) for a more professional look. Keep your ISO low to avoid grainy images.
- Step 4: Find the Right Angle: Stand back and look around the room before you begin. Take a few practice shots to find the best angles. Experiment with different perspectives—corner shots often work well in interiors because they can more easily capture the depth of a space. Aim to catch the room’s size, layout, and main design elements in your photos.
- Step 5: Focus on Composition: Remember the rule of thirds, which teaches you to place important elements off-center for a more compelling shot. Make sure the lines in the room are straight and level, since tilted angles can be distracting.
- Step 6: Edit Your Photos: Once you’ve captured your images, it’s time to edit them. Use your favorite editing software or phone app to tweak the brightness, contrast, and sharpness. Don’t over-edit—aim to enhance the photo without altering the true look and feel of the space. Adjust white balance to ensure colors are accurate, and remove any distracting objects in the background if needed.
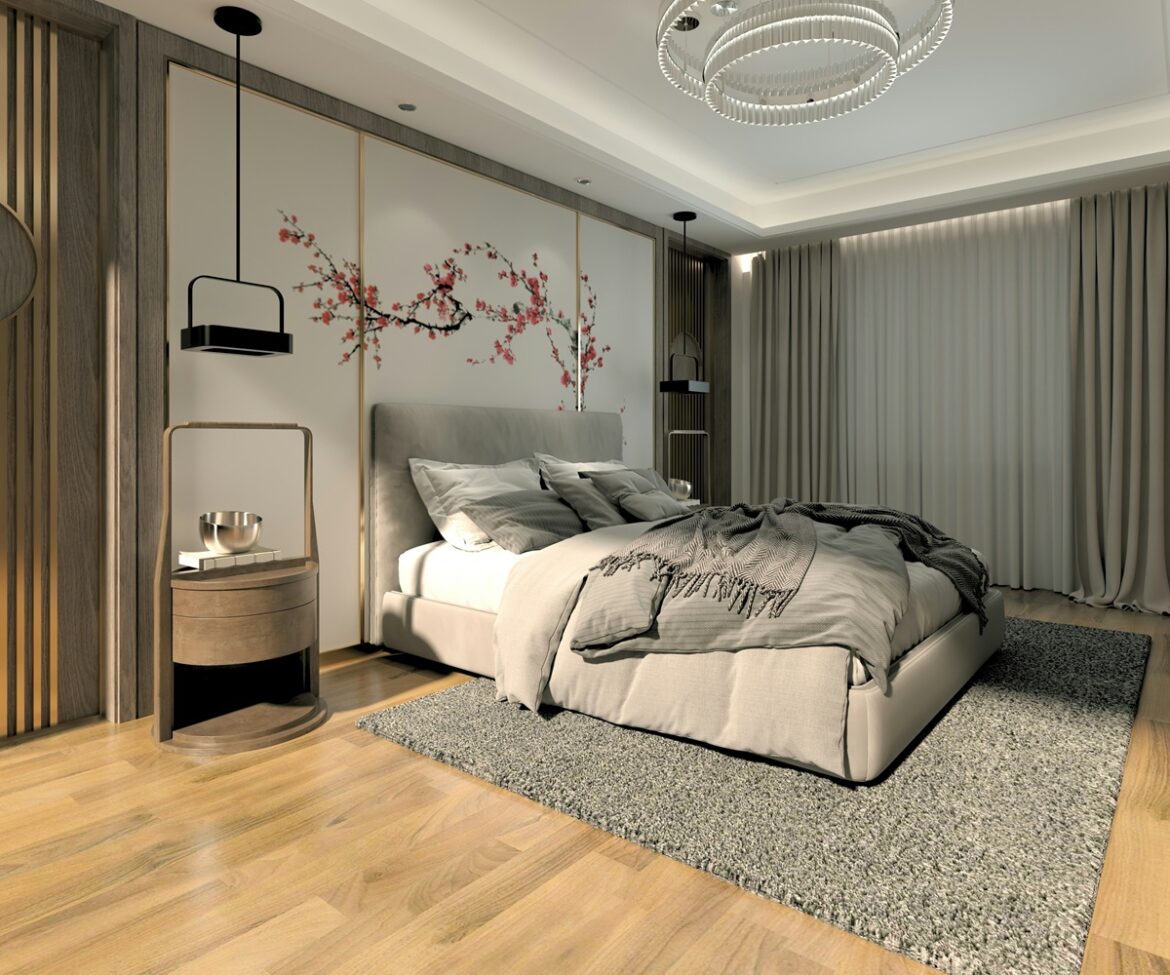
Lighting and mood are so important. Consider whether or not you want direct sunlight on your photos as a way of communicating mood. For example, this photo features a little bit of direct sunlight to convey a sense of calmness.
Tips for Better DIY Interior Photography
Here are some additional tips to elevate your DIY interior photography and get the most out of your images:
- Use a tripod: Stability is key. A tripod guarantees your camera will stay perfectly still.
- Mind the details: Avoid photographing wires, clutter, or reflections in mirrors or windows. Clean them up before you shoot. Pay close attention to your styling — DIY styling can make or break your shot.
- Capture both wide and close-up shots: Wide shots provide an overview of the space, while close-ups allow you to showcase textures, materials, and intricate design elements. A combination of both can make your project stand out in photos.
- Avoid flash: Flash can create unflattering light as well as harsh shadows. Stick to natural or soft artificial light whenever possible.
- Take multiple shots: The more you shoot, the greater your chances of capturing the perfect image. Experiment with various angles and lighting conditions to see what works best. Don’t be discouraged if things don’t look perfect at first—keep shooting and refining your approach to get closer to that ideal shot. Once you’ve curated your best DIY shots, upload them to DesignFiles to enhance your project portfolio, share them in client-facing proposals, or feature them in your design package listings.
- Be patient: Interior photography can take time, especially if you’re new to the process. Remember not to rush—it can take a few attempts to get everything just right.
How to establish a cohesive brand feel for your photographs
Cohesive imagery prevents your portfolio from becoming a random assortment of images. Instead, it turns your work into a curated collection that reflects your professional identity. Whether you’re taking the photos yourself or hiring a photographer, consistency is key to making a lasting impression. Here are a few tips to help you maintain cohesion across your photos:
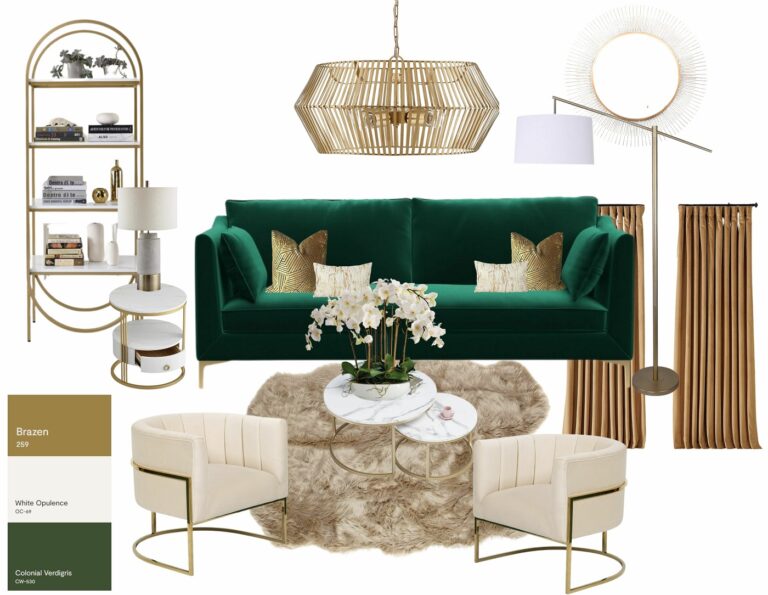
- Define Your Visual Style: Before you start shooting, take time to define what your brand’s visual style actually is. Do you lean toward minimalism, maximalism, or a more eclectic aesthetic? Is there a particular color palette or mood you want to convey—calm and serene, bold and energetic, or something else entirely? Make sure your photos reflect this style across the board. If you’re unsure of your aesthetic direction, check out our guide to the top interior design styles. With a clear style, you can keep your look consistent across your website, interior design presentations, moodboards, and more.
- Use the Same Editing Style: Editing plays a significant role in creating a cohesive look for your images. Whether you’re using Lightroom, Photoshop, or a mobile editing app, aim for a consistent color grade, contrast, and exposure. If your brand leans towards light and airy, keep your photos bright with minimal saturation. If your aesthetic embraces richness and depth, go for darker tones and more dramatic contrasts. Use the same presets or filters for every shoot to maintain consistency.
- Stay Consistent with Props and Styling: Think about the items you consistently use—maybe it’s certain textures (like wood, marble, or textiles) or a particular color accent (like muted pastels or bold pops of color). By repeating these design elements in your shots, you reinforce your brand’s identity visually. If you’re working with a photographer, make sure to discuss styling preferences so the look aligns with your brand’s established feel.
- Use the Same Gear or Camera Settings: If you’re taking the photos yourself, using the same gear and settings for each shoot will help keep your images consistent. This includes sticking with a specific lens (like a wide-angle or standard prime), keeping your ISO, aperture, and shutter speed consistent, and ensuring your white balance remains constant.
- Communicate Clearly with Your Photographer: If you’re hiring a photographer, clear communication is key to ensuring they understand your brand’s aesthetic. Create a mood board, share your previous work, or direct them to your website and social media profiles for a reference point. Be specific about what you want from the shoot—lighting, composition, props, and even the mood you want to evoke in the final image.
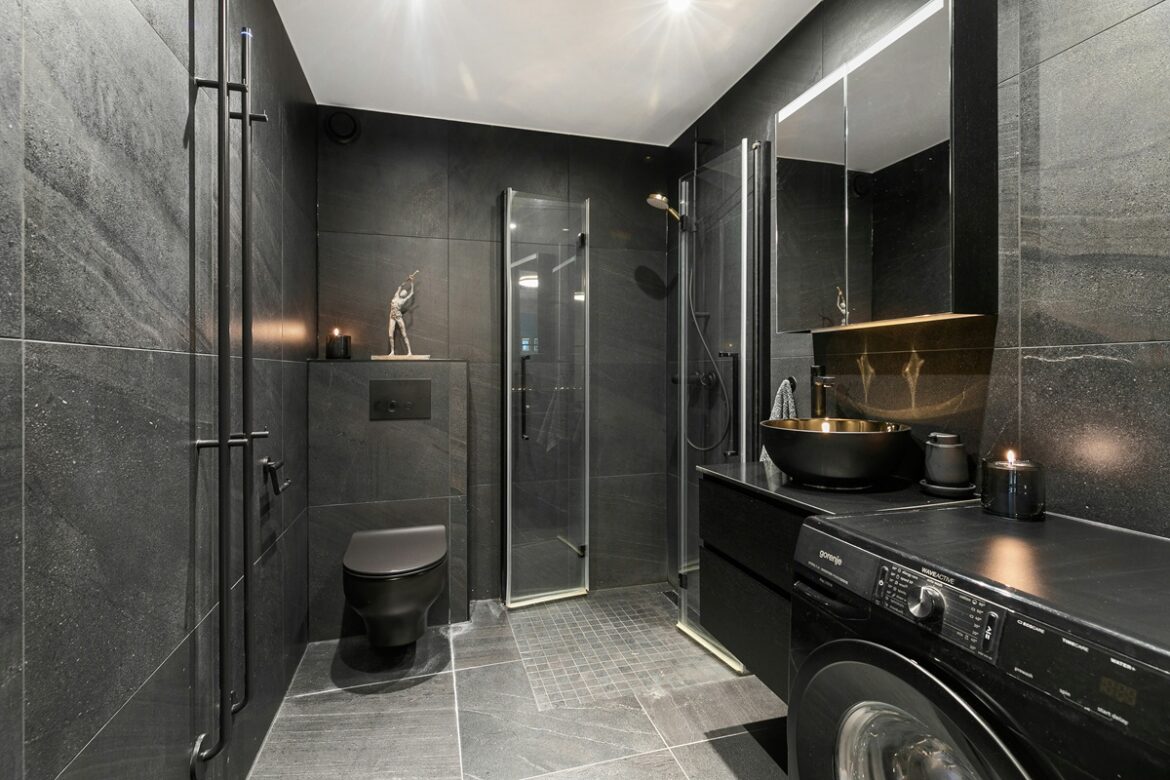
No matter what, make sure to always focus on your target audience. Take a look at this example below. The style clearly appeals to a city-dwelling bachelor. The photographer makes sure to capture the washing machine, showing not only the masculine aesthetic but the utility of the design as well.
You can also use DesignFiles to create client proposals that include your portfolio images, giving prospects a beautifully branded, professional look at your design capabilities from the start. And when it comes to attracting your target audience, DesignFiles offers pricing packages so you can add your best portfolio pieces, SEO-optimize your offerings, and collect payments online.
Remember: strong interior photography isn’t optional—it’s essential. Whether you’re capturing images yourself or working with a professional, the goal is the same: to showcase your business in the best possible light. Know when to invest, when to DIY, and always aim for consistency. Your images are often your first impression—and with a little bit of planning, you can make sure they always reflect the quality of your designs.
Ready to grow your business and show up like a pro? Try DesignFiles free today, no credit card required.